

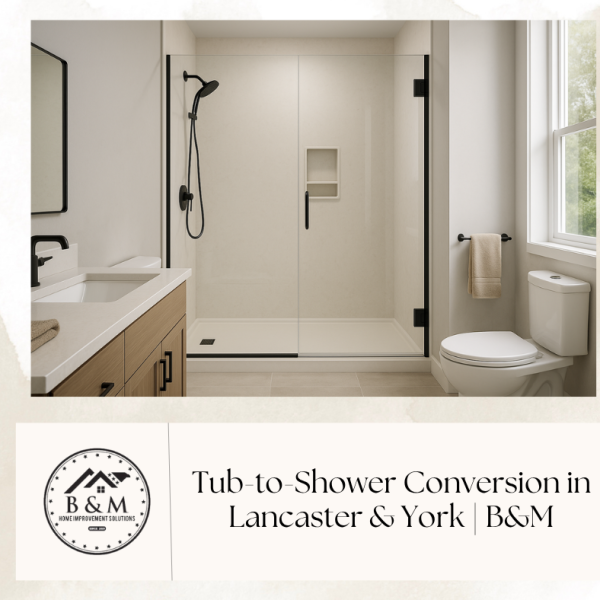
Tub-to-Shower Conversion in Lancaster & York (2025 Homeowner Guide)
Audience: Homeowners in Lancaster County and York County, PA
tub-to-shower conversion Lancaster & York
Intro
If you’re ready to replace a hard‑to‑step‑over tub with a safe, low‑maintenance walk‑in shower, a tub‑to‑shower conversion in Lancaster & York typically takes 3–5 working days once materials are on site. Budget ranges depend on size, selections, plumbing moves, and glass style. Samuel Mueller walls and pans deliver a clean, low‑grout look with fast installs; tile delivers more customization but requires extra waterproofing steps and time. Permits are straightforward in most townships. Below, we map exact timelines, line‑item cost drivers, and aging‑in‑place upgrades B&M installs every week across Central PA.
Why Central PA Homeowners Are Converting Tubs Now
Safety & comfort. Lower thresholds, slip‑resistant flooring, and grab bars reduce fall risk.
Space & storage. Smart niches, benches, and glass open up small bathrooms in Bent Creek, Manheim Twp, Lititz, and Spring Garden.
Maintenance. Large‑format tile or Samuel Mueller wall panels mean fewer grout joints.
Resale. In Lancaster County and York County, a modern primary shower helps homes show better to 35+ buyers.
What Counts as a Tub-to-Shower Conversion?
A standard 60″ alcove tub is removed, and a shower base with waterproofed walls and new glass goes in its place. B&M handles:
Selective demo and protection
Drain re‑set and valve updates
Waterproofing (behind tile) or interlocking Samuel Mueller panels
Glass, doors, trims, and accessories
Final caulk, clean, and walkthrough
Good fit: Households in Lancaster, York, and surrounding Central PA suburbs with at least one other tub in the home or those who prioritize a safer, larger shower over a tub.
Typical Timelines (By Day)
Timelines (Choose One Path)
A) Samuel Mueller Walk-In Shower — 3 Working Days On-Site
Pre-construction (1–3 weeks before): Design/selections, order panels/base/glass, permit if needed, schedule crews. If custom glass is selected, template occurs Day 3 and glass installs after fabrication (we’ll install a temporary curtain and return for glass set).
Day 1 — Protection, Demo, Rough Prep
Protect floors/containment.
Remove tub/surround, expose framing and drain.
Inspect/repair subfloor and studs; add blocking for grab bars/bench if specified.
Rough-in valve upgrade (pressure-balanced/thermostatic) and place drain (reuse or re-center as needed).
Dry-fit Samuel Mueller base.
Day 2 — Base Set & Panel Work (Primary Walls)
Set and level Samuel Mueller base; connect drain and verify slope.
Plumb/true walls; install wall panels (back and one side), adhere per spec, seal seams.
Cut and install niche openings, trims, sills.
Set valve/trim test plate; water test.
Day 3 — Finish Panels, Accessories, Punch
Install remaining wall panel(s), inside/outside corner trims, returns.
Install accessories: niche boxes, corner shelves, bench/seat (if fold-down: mount into blocking).
Final sealant at change-of-plane joints; set showerhead/handshower and slide bar.
Clean, caulk cure briefing, homeowner walkthrough.
Glass:
Stock slider: measure/set today if in stock.
Custom frameless: template today; install on return visit when fabricated.
Typical return visit(s): custom glass set (60–90 minutes) and a quick sealant check after full cure.
B) Tiled Walk-In Shower — Minimum 7 Working Days On-Site
Pre-construction (2–4+ weeks before): Design/selections, order tile/stone, glass, drain kit/membrane, fixtures; permit if required; tile and glass lead times confirmed.
Day 1 — Protection, Demo, Rough Carpentry/Plumbing
Protect floors/containment.
Remove tub/surround; expose framing/drain.
Repair or plane studs; sister as needed for flatness.
Add blocking for bench, grab bars, doors.
Rough-in new valve/handshower; relocate/center drain if specified.
Day 2 — Pan & Substrate
Install shower drain assembly and pre-slope (if mortar pan) or set foam/linear drain system per spec.
Install approved backer board on walls; tape seams with alkali-resistant mesh.
Day 3 — Waterproofing & Flood Test Setup
Apply sheet or liquid waterproofing to pan and walls (full height to above showerhead).
Detail corners, penetrations, and niches.
Plug drain; begin 24-hour flood test (pan holds water to check for leaks).
Day 4 — Flood Test Read & Wall Tile Start
Inspect pan; document pass, remove test plug.
Layout and begin wall tile (primary walls).
Maintain grout joint alignment to niche and valve centerlines.
Day 5 — Wall Tile Finish & Niche/Bench Details
Complete wall tiling, niche faces/sills, bench top.
Set trims, metal profiles or bullnose.
Clean thinset squeeze-out; prep for grout.
Day 6 — Grout & Detail
Grout all walls/bench/niche; tool joints; initial haze removal.
Set fixtures trim plates and temporary protection.
Seal stone (if specified) once grout has initial cure.
Day 7 — Glass & Final Caulk
Custom frameless glass template & install if lead time allows; otherwise template today and schedule install upon fabrication.
Install door sweeps, strikes; silicone change-of-plane joints (pan/wall, corners) after grout set.
Final clean, homeowner walkthrough, care instructions.
Add 1–2 buffer days for: complex patterns, mosaics, large-format tile cuts, linear drains, or if flood-test/inspection scheduling shifts. Custom glass often templates Day 7 and installs after fabrication on a short return visit.
Cost Drivers (and How to Control Them)
While every home is different, your investment will be shaped by:
Base & walls
Samuel Mueller base + walls: Fast install, minimal seams, crisp look.
Tile base + tile walls: More layout options and patterns; requires more labor.
Plumbing changes
Drain move to center, valve upgrade, showerhead/handshower additions.
Glass
Bypass sliders are budget‑friendly; frameless swing panels add clarity and value.
Storage & seating
Niches, corner shelves, fold‑down or built benches.
Upgrades
Heated floors (adjacent bath floor), rainfall heads, linear drains, lighting.
Ways to stay on budget: choose Samuel Mueller walls for fewer seams; keep drain location; opt for stock glass sizes; bundle bath updates to save return trips.
Material Choices That Work in Central PA
Shower Bases
Samuel Mueller base: Low‑threshold, rigid feel, non‑porous surface, integrates neatly with matching panels.
Tiled base: Flexible sizing, especially for odd alcoves; specify a quality membrane and properly sloped mortar bed.
Wall Systems
Samuel Mueller panels: Sleek, easy‑clean, color/texture options that complement Lancaster farmhouses and York colonials.
Tile walls: From large‑format to stone looks; pair with epoxy or high‑performance grouts to reduce upkeep.
Glass
Bypass slider (60″): Practical for tight hall baths.
Hinged door + panel: Clean sightlines in primary suites.
Fixtures & Finishes
Satin nickel and matte black remain strong in Central PA listings. Handshowers on slide bars are a must for aging‑in‑place and easy cleaning.
Aging-in-Place Upgrades We Recommend
Low threshold or curbless entry (site conditions permitting)
Grab bars positioned at entry, valve, and bench (stud blocking installed)
Bench (fixed or fold‑down)
Handshower with easy reach and anti‑scald valve
Non‑slip floor texture and proper lighting
These upgrades often qualify as “universal design” features and pay dividends in daily comfort.
Waterproofing & Moisture Control (What You Don’t See Matters)
Continuous membrane behind tile, fully sealed seams, and fastener protection
Properly sloped pan and linear drains where appropriate
Fan sizing and run‑time controls to keep humidity in check
B&M’s teams follow a “belt‑and‑suspenders” approach: redundant seals at all change‑of‑plane joints and niche perimeters.
Local Supply & Craft Partners
Sourcing locally keeps projects moving and supports Central PA trades. Depending on selections, your job may include materials or coordination with:
Hajoca (plumbing fixtures and valves)
Red Rose Cabinetry (vanities/storage when bath updates are bundled)
Lezzer Lumber (framing/board)
Too the Trades (Tile/ Waterproofing Supplies)
Henry H. Ross & Son (stone tops if vanities are part of the scope)
Natural Stoneworks (Tile/ thresholds/sills/ Tops when specified)
B&M coordinates ordering, inspections, and schedules so your project stays on track.
Lancaster & York Permit Basics (Plain-English Overview)
Mechanical/Plumbing: Valve swaps and drain work are typically permitted; inspections verify safe, code‑compliant installations.
Electrical (if lighting/fan is added): Expect a simple rough‑in and final.
Curbless conversions: Some townships require additional details on slope and waterproofing.
B&M handles the paperwork, schedules inspections, and meets the inspector so you don’t have to. Requirements vary by municipality; we confirm your specific township steps during pre‑construction.
Real-World Layout Tips (From Our Field Teams)
Niche placement: Keep the niche out of the direct spray path and align grout joints cleanly.
Valve height: Set for the tallest user while keeping controls reachable from outside the spray line.
Glass swings: Ensure door clears vanities and toilets; sliders shine in tight hall baths.
Lighting: A dedicated shower‑rated recessed light makes tile and Samuel Mueller finishes pop.
Mini Case Notes Across Central PA
Bent Creek (primary bath refresh): Doorless, fixed‑panel glass, Samuel Mueller walls, and a corner bench created an open look in a 60″ alcove—done in four workdays.
Manheim Township (hall bath safety): Low‑threshold base, three grab bars, and a handshower made daily routines easier without changing the footprint.
Lititz (character home): Large‑format stone‑look tile, linear drain centered to the entry, frameless glass with a narrow swing to clear window trim.
Spring Garden (townhome): Bypass glass, niche, and matte black trims kept the budget tight while lifting resale appeal.
What to Expect from B&M’s Process
Design & selections tailored to Lancaster & York styles
Dust control & daily cleanup to keep your home livable
Dedicated project lead for scheduling and status updates
Final quality walkthrough with a written punch list (if needed)
Care guide for tile and Samuel Mueller surfaces
Internal Resources to Explore Next
Bathroom Remodeling Permits in Lancaster & York: What to Expect
Best Shower Wall Options: Tile vs. Samuel Mueller in Central PA
Ready For Next Steps?
Ready to step into a safer, better‑looking shower—without weeks of disruption? B&M has specialized crews for tub‑to‑shower conversion in Lancaster & York. Get a same‑week in‑home consultation, a clear fixed proposal, and a start date that sticks.
walk-in shower Lancaster PA
walk-in shower York County
tub to shower conversion cost Central PA
Lancaster bathroom remodel timeline
aging in place shower upgrades
Samuel Mueller shower walls
curbless shower Lancaster
bathroom permits York PA
FAQs
If it’s your only tub, we’ll talk through buyer expectations in your neighborhood. Many families still want one tub. If you have a second bath, a spacious shower in the primary is a win.
Yes. Most conversions stay within the 60″ alcove. We can also widen or re‑frame if you want more elbow room.
Samuel Mueller minimizes grout lines and cleans quickly. With tile, choose larger formats and high‑performance grout for easier upkeep.
Not always. Standard bypass sliders fit many alcoves. For out‑of‑plumb walls or special layouts, custom glass is worth it.