

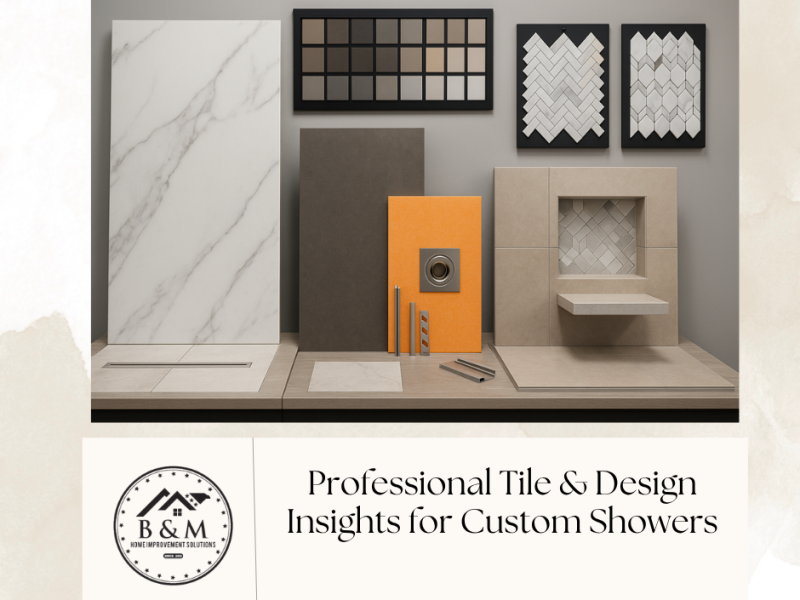
Professional Tile & Design Insights for Custom Showers
Introduction: Upgrading to a custom tiled shower can transform your bathroom into a spa-like retreat while also adding lasting value to your home. As a contractor with decades of tile design and installation experience, I understand which design features truly elevate a bathroom and the practical considerations behind them. In this comprehensive guide, we’ll explore key custom shower upgrades – from floor-to-ceiling tile and built-in benches to curbless entries and sleek niches – and explain the technical essentials (like waterproofing, mortars, and grout choices) that ensure your new shower isn’t just beautiful, but also durable and low-maintenance. By the end, you’ll know exactly what to look for in a quality custom shower and see that you’ve chosen an educated contractor who follows industry standards. Let’s dive in!
Design Features That Elevate Your Shower
The best custom showers blend stunning design with smart functionality. Here are the top design features and upgrades many homeowners request, and how each can enhance your shower:
Floor-to-Ceiling Tile for a Luxe Look
Extending tile work all the way up to the ceiling instantly gives a shower a high-end, cohesive appearance. Floor-to-ceiling tile draws the eye upward, making the space feel larger and more polished. It also protects your walls from moisture better than the bare minimum coverage. In fact, industry guidelines recommend waterproofing the wall area at least a few inches above the showerhead height – tiling to the ceiling achieves and exceeds this. By fully wrapping the shower enclosure in tile, you eliminate the awkward paint or drywall strip above a typical shower surround and instead get a seamless, water-resistant envelope. This not only looks luxurious but reduces maintenance, since you won’t have to repaint or worry about drywall damage near the ceiling. Whether you choose classic subway tile, large-format porcelain slabs, or natural stone, running them to the ceiling provides a designer touch. We also pay attention to details at the top edge: if the ceiling isn’t tiled, we finish the top course with trim or Schluter® profile strips for a clean edge rather than an exposed tile cut. Overall, floor-to-ceiling tiling is a relatively simple upgrade that dramatically elevates the shower’s presence while adhering to best practices for moisture protection.
Built-In Shower Benches
A built-in shower bench is one of the most popular features in custom showers – and for good reason. Shower benches add comfort, accessibility, and a spa-like luxury to the space. They provide a convenient seat for anyone who needs extra stability or wants to relax under the water. They’re also handy for practical tasks like shaving your legs or storing extra toiletries. From a design perspective, a tiled bench becomes a beautiful focal point that can make the shower feel more like a high-end steam room or sauna. According to the National Kitchen & Bath Association (NKBA) guidelines, an ideal shower seat is 17–19 inches high and about 15 inches deep – similar to a chair – which is comfortable for most adults. We follow these ergonomic standards when constructing custom benches, unless a client needs something adjusted for their stature.
Importantly, a bench must be built rock-solid and fully waterproof. We use methods recommended by the Tile Council of North America (TCNA) to frame and waterproof benches so they won’t flex or leak. The bench top is always pitched slightly toward the drain (about 1/8″ to 1/4″ per foot) to prevent water from pooling. We then finish benches with the same tile as the walls or a contrasting material (like a stone slab) depending on the look you want. All edges are protected – often with Schluter trim profiles – to avoid sharp corners and keep the tile from chipping. The result is a bench that looks like an integrated part of the design and will stand up to daily use. A well-built tiled bench “adds accessibility, structural beauty, and an undeniable touch of luxury” to your shower. Many homeowners say it becomes their favorite spot to relax and it reassures them that the shower is built with aging-in-place and comfort in mind.
A custom walk-in shower featuring a built-in corner bench and coordinating niche. The bench adds comfort and accessibility, while the entire shower is tiled floor-to-ceiling for a seamless, luxurious look. Proper construction and trim details (notice the sleek metal profile edges) ensure the bench and niche are fully waterproof and stylish.
Curbless (Barrier-Free) Shower Entry
Nothing says “modern luxury” quite like a curbless walk-in shower. Removing the traditional 4-6 inch step-over curb creates a seamless entry – the bathroom floor and shower floor are level with no barrier between them. This design feature not only looks sleek and open but also makes the shower far more accessible. Older adults or those with mobility issues appreciate curbless showers because there’s no threshold to trip over or restrict a wheelchair. Even if your household is currently fully able-bodied, a barrier-free shower is a smart future-proofing upgrade (and a selling point for resale) since it aligns with universal design principles for all ages and abilities.
From an aesthetic standpoint, curbless showers make the bathroom feel larger and more continuous. Without a dividing curb or curtain, the flooring can flow right into the shower area, and light travels further – excellent for small baths that need an airy, open feel. It’s also easier to clean – there are fewer corners and edges to collect grime, and you can literally walk or squeegee right out of the shower without obstruction. Many curbless designs use a sleek glass panel or no door at all, which lets you showcase creative tile work and accent features without visual interruption.
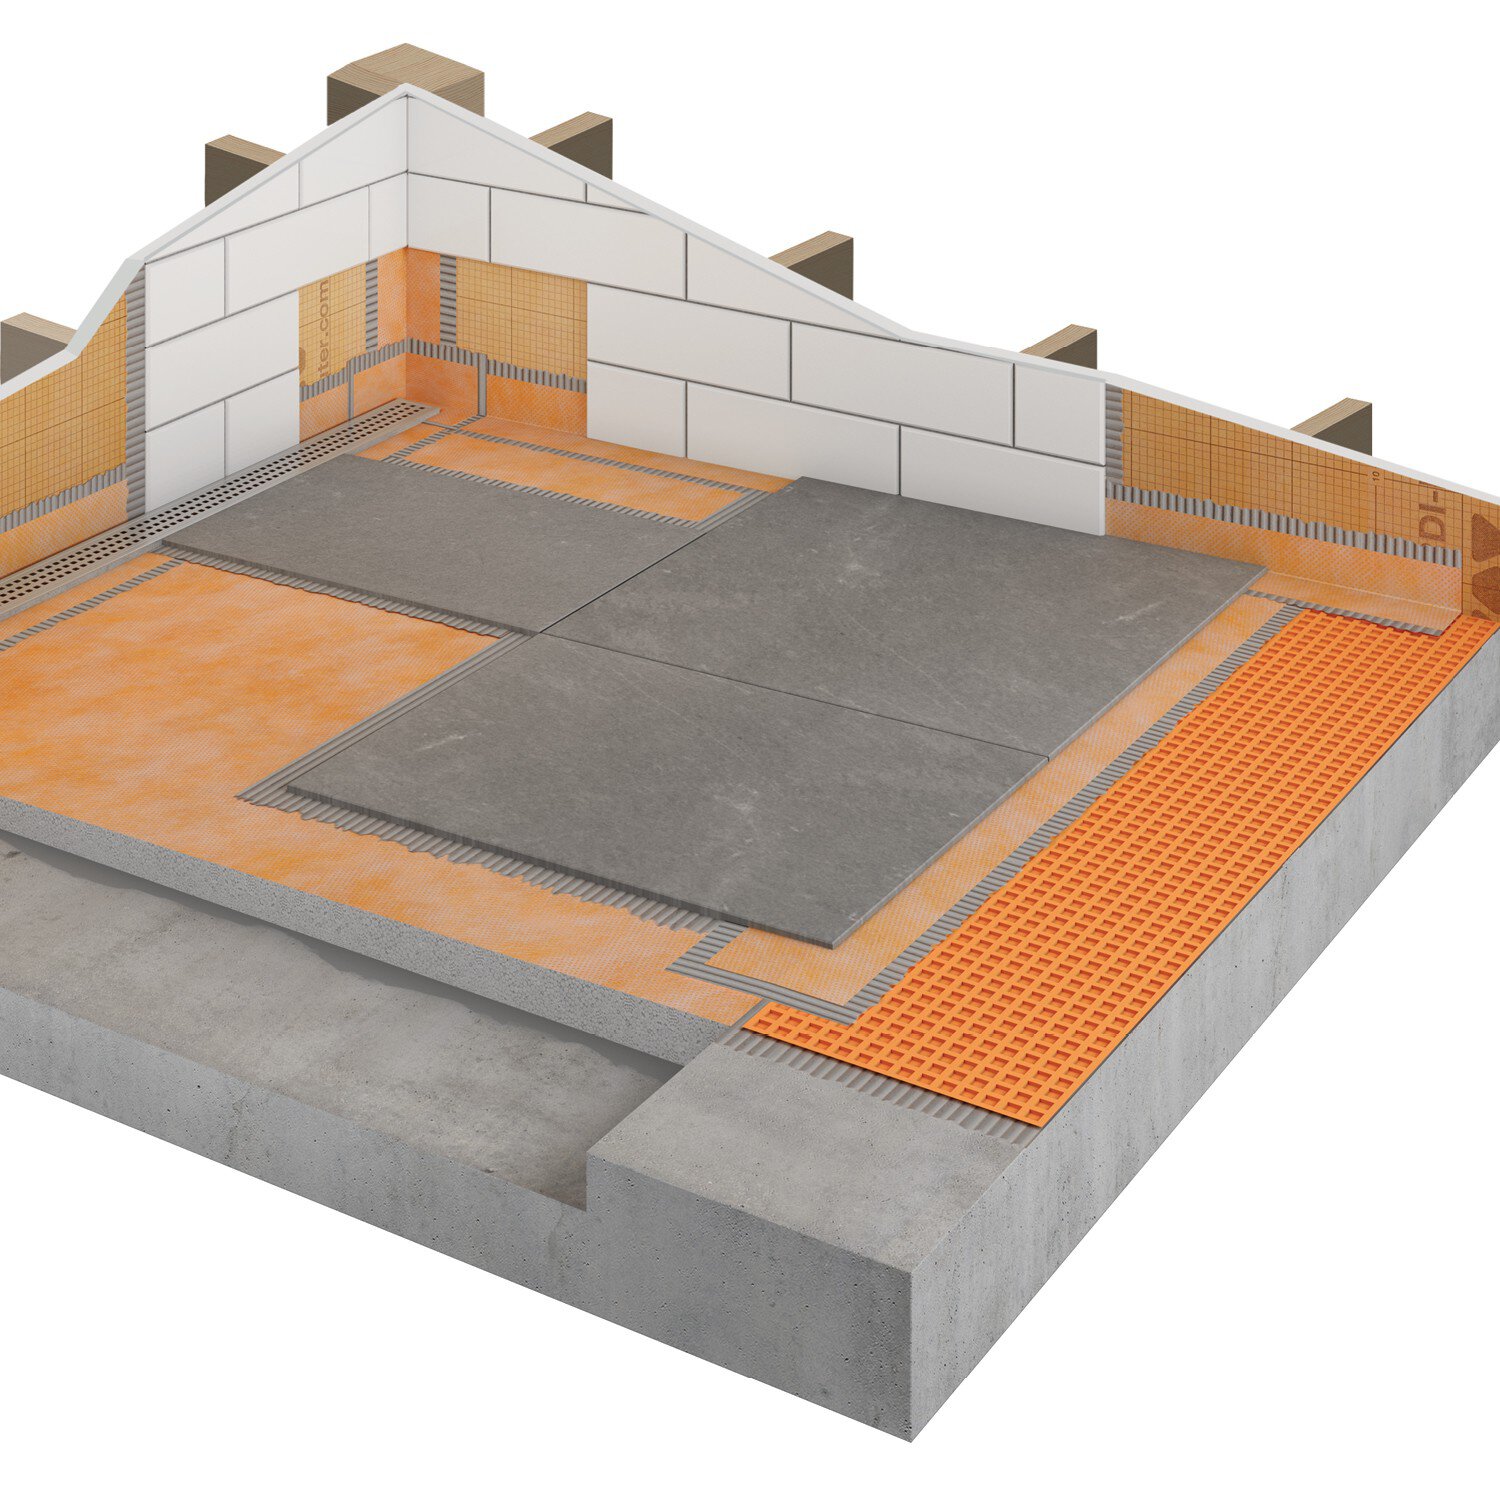
It’s important to note that going curbless requires careful planning and execution. We must create a gentle slope in the shower floor (at least 1/4″ drop per foot per code) toward the drain to ensure water containment. In many cases, the bathroom subfloor is lowered (depressed) or adjusted during construction so that the finished shower floor can be flush with the main floor while still sloping properly to the drain. We often incorporate a linear drain along one edge of the shower (for example, at the doorway) because it allows for a single slope direction and makes curbless designs easier and more effective. Whichever drain style is used, waterproofing is absolutely critical in curbless showers because there’s no curb to stop splash water. The shower floor pan and walls are wrapped with a continuous bonded waterproof membrane (ANSI A118.10 compliant) that extends beyond the shower a certain distance to keep adjacent areas dry. In fact, TCNA standards call for the waterproofing to continue at least 12 inches beyond the high point of a curbless shower floor. We follow these guidelines closely, effectively turning the whole shower zone into a watertight basin even without a curb. When built correctly, a curbless shower is 100% functional and leak-free while offering a beautiful, barrier-free experience. If a true curbless entry isn’t feasible due to structural constraints, we can often minimize the curb height or use a low-curb design as a compromise – but whenever possible, curbless is the ultimate custom upgrade for both elegance and accessibility.
Recessed Niches for Storage
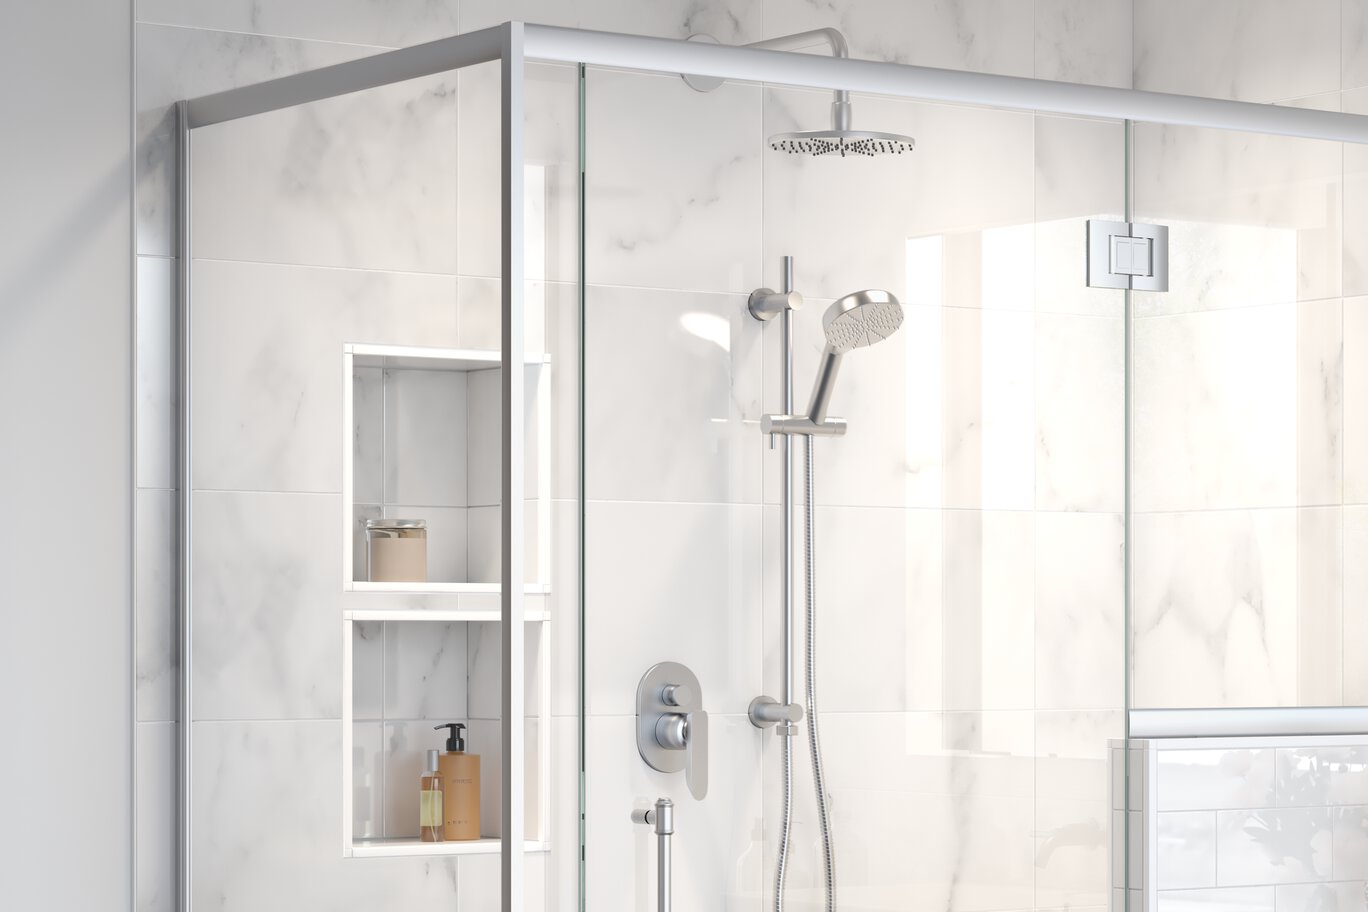
Shampoo bottles and soap bars need a home, and nothing beats a tiled recessed niche for a clean, clutter-free look. Niches are those built-in “cubby” shelves inset between wall studs, usually located at chest or shoulder height, where you can neatly store your shower products. Adding one or more custom niches to your shower eliminates the need for flimsy hanging caddies or corner shelves, and it gives the shower a sleek, built-in storage solution. From a design perspective, niches are an opportunity to add visual interest: many homeowners choose to tile the back of the niche with an accent mosaic or a contrasting tile to make it pop as a feature. This can tie together the overall design – for example, using the same mosaic in the niche and shower floor, or matching the niche accent to a border stripe in the shower. The result is both practical and stylish.
When we construct niches, we ensure they are completely waterproof and properly framed. A niche is essentially a big hole in your shower wall, so it must be sealed on all sides. We line the niche with waterproof membrane and often use prefabricated niche boxes or panels made for this purpose to guarantee no leaks. Just like benches, niche shelves are slightly sloped toward the shower so water doesn’t sit inside. We finish all the edges with care: if the tile itself doesn’t have factory bullnose edges, we’ll use Schluter trim profiles along the niche border for a crisp, professional finish. These metal or PVC profiles not only look great (available in various colors to match your fixtures or tile) but also protect the tile edges from chipping and prevent water from seeping behind the tiles at the niche corners. We can configure niches tall for shampoo bottles or wider as needed, even create multiple niches (for example, a lower shaving niche near the floor in addition to a main storage niche). The placement is customized to your height and preference, typically centered on a wall or symmetrically placed for visual balance. Overall, a well-designed niche is a small upgrade that greatly improves daily functionality – your bottles are within easy reach yet tucked out of sight – and it signals that every detail of the shower was thoughtfully considered.
Additional Upgrades and Accents
Beyond the big-ticket features above, there are other design touches that can take your custom shower to the next level:
Accent Tile and Borders: Incorporating decorative mosaics or contrasting tile bands can personalize your shower. For example, a stripe of glass mosaic around eye level, or a feature wall of herringbone-pattern tile behind a rain shower head, creates a striking focal point. These accents should be used purposefully so they don’t overwhelm the space – often a vertical band in the wall or an accent in the niche is enough to add character. We’ll ensure any accent pieces are flush with surrounding tiles or properly transitioned using edge trim so the result is smooth and elegant.
Quality Fixtures & Enclosures: While not tile per se, the choice of fixtures and glass enclosures impacts the overall design. Frameless glass doors or panels are popular in custom showers because they showcase the tile work and make the room feel open. We coordinate the layout so that niches or benches align nicely with glass panels, and we make sure there are solid mounting points (wood blocking behind tiles) for heavy glass or hand-held shower bars, etc. Consider fixtures like a rain showerhead, body sprays, or a handheld shower on a slide bar – these can be planned into the design and their plumbing roughed-in before we tile. We’ll also discuss practical layout issues, like placing controls where you can reach them before getting wet, in line with NKBA recommendations (shower controls usually 38–48″ above floor and accessible from outside the spray). These thoughtful touches contribute to both functionality and high-end feel.
Lighting and Ventilation: A well-lit shower is more inviting. We can install recessed light fixtures rated for wet locations in the ceiling above the shower, which is especially helpful in enclosed or tiled-ceiling showers. Good lighting showcases your tile’s colors and textures. Likewise, an adequately sized exhaust fan is crucial to remove humidity – protecting your investment by preventing mold growth in the bathroom. While these features are often handled by electricians/HVAC, we coordinate their placement (for instance, sloping a tiled ceiling toward a linear drain if it’s a steam shower with a vapor-tight light, etc.). Proper ventilation also complements the mold-resistant materials we use in the shower itself (more on that below).
Heated Floors and Towel Warmers: Stepping out of a warm shower onto a cold floor can be jarring, so some homeowners opt to extend a radiant heat mat under the bathroom floor tile and even into the shower floor (with appropriate waterproofing) for a touch of luxury. If you’re interested in a heated shower floor, we choose a system rated for wet areas and embed it in the thinset below the tile. Nothing feels better on a chilly morning than a toasty warm tile floor. Similarly, heated towel bars or racks can be added outside the shower for that full spa effect. These upgrades make your daily routine more comfortable and show an attention to detail in a custom bath project.
All these design features are aimed at creating a shower that is both stunning and suited to your lifestyle. We combine aesthetics (beautiful materials and layouts) with practicality (code-compliant and convenient) following well-established design guidelines. For instance, NKBA recommends at least a 36″ x 36″ shower interior for comfort (larger if possible), slip-resistant flooring for safety, and blocking in walls for future grab bars – all of which we incorporate into our designs. Next, we’ll discuss how we build these features correctly, using the right techniques and materials, so that your investment lasts a lifetime.
Building It Right: Waterproofing and Construction Standards
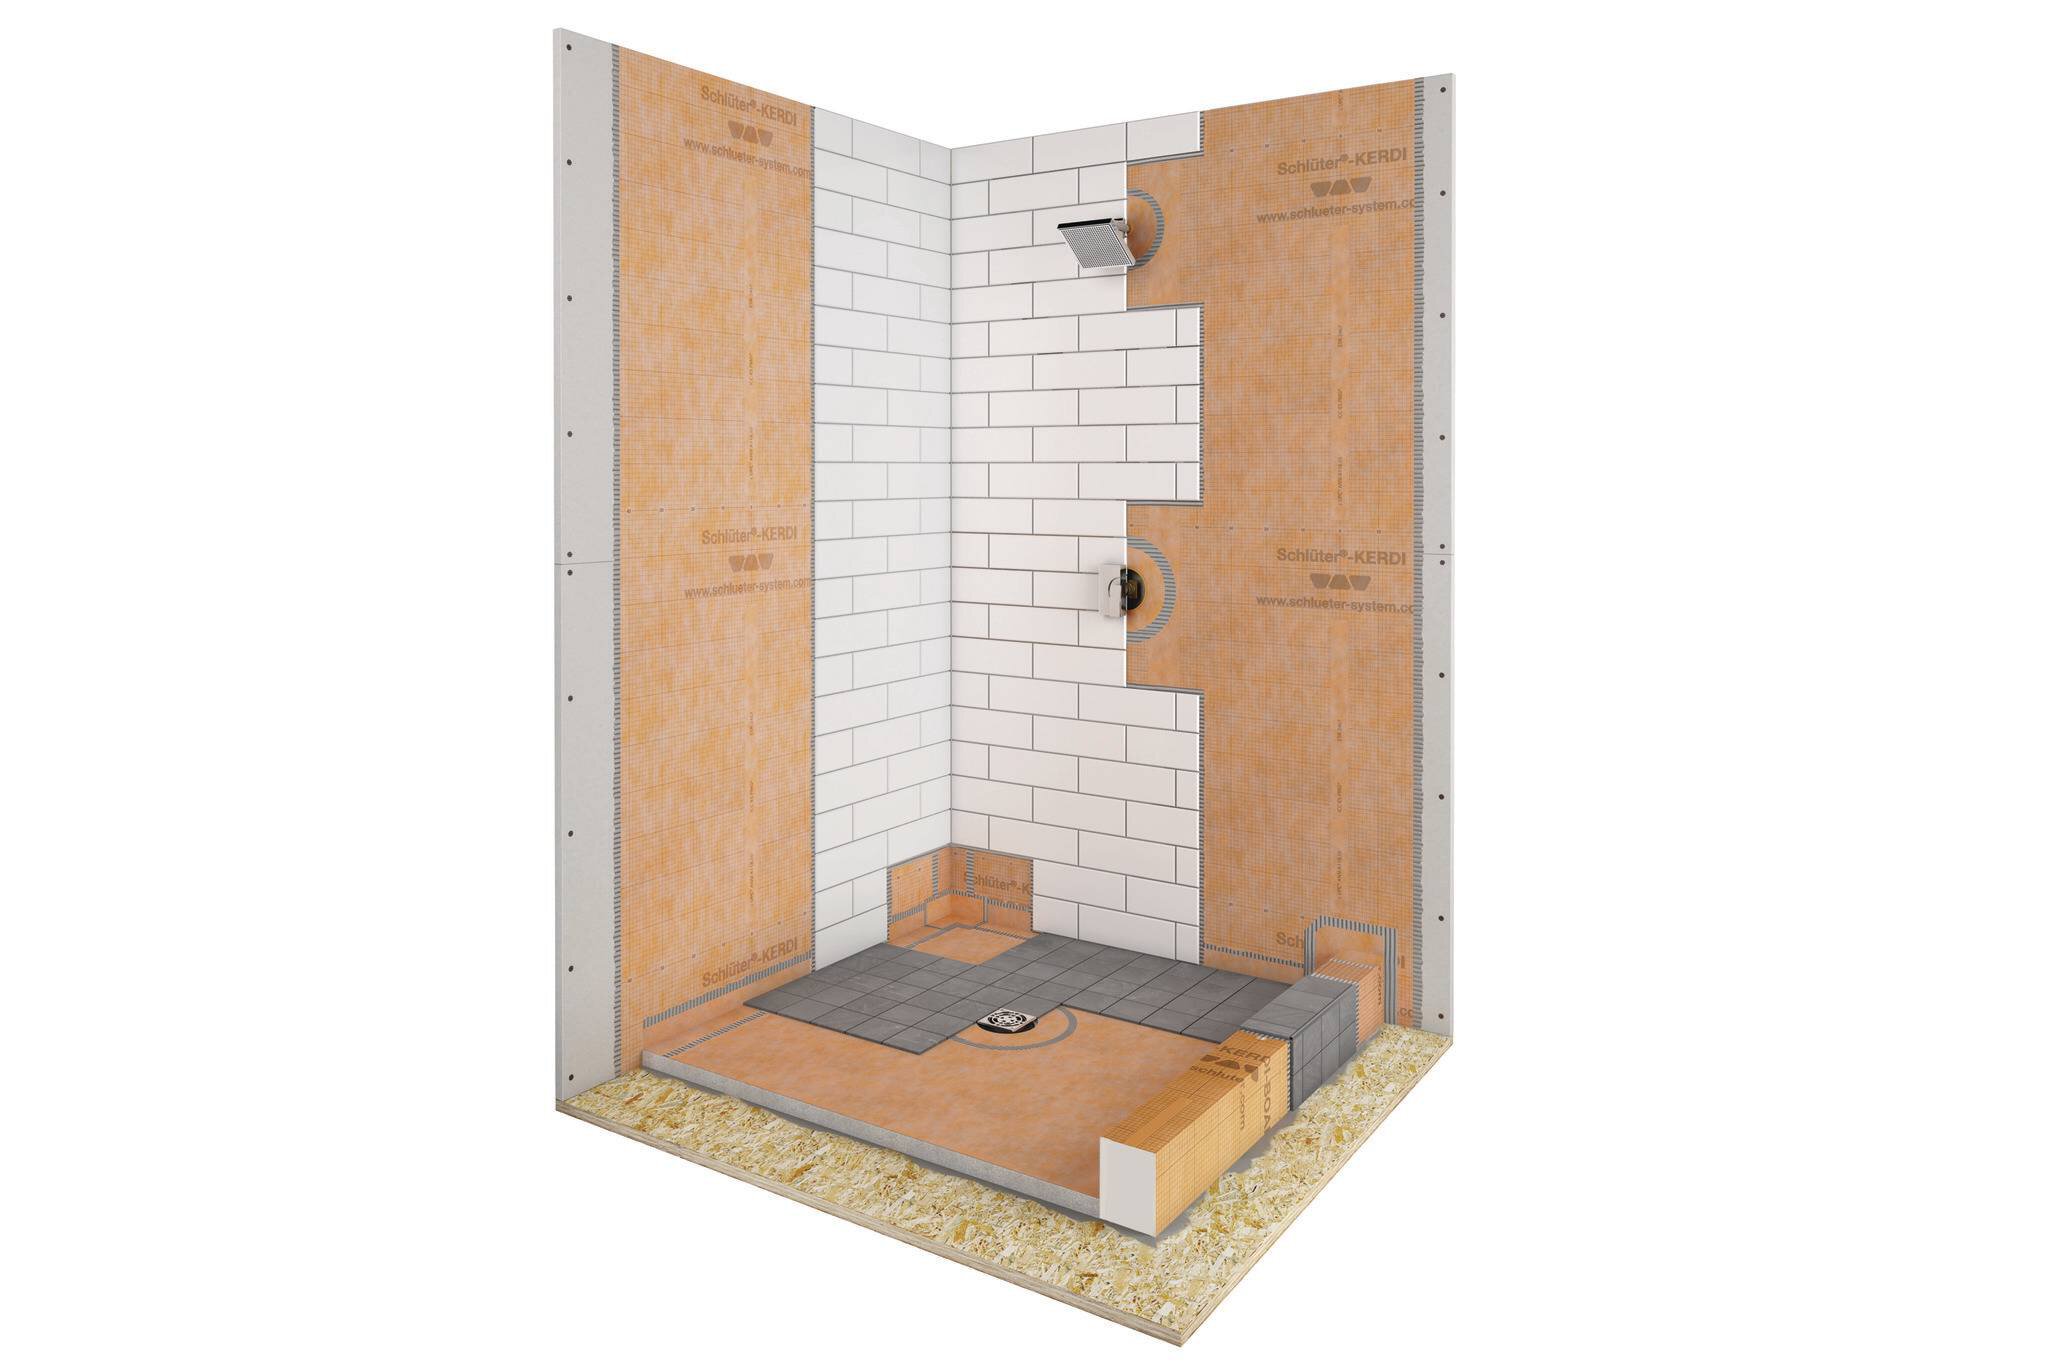
Even the most gorgeous tile won’t mean much if what’s behind it isn’t done properly. A custom shower must be built to withstand constant water exposure and daily wear – that’s where professional expertise and adherence to standards come in. Our team follows the Tile Council of North America (TCNA) Handbook and American National Standards Institute (ANSI) guidelines to ensure your shower performs as great as it looks. Here are the key technical elements we focus on:
Structure & Slope: We start with a sound substructure. Shower floors are framed or set such that they slope a minimum of 1/4 inch per foot towards the drain, as required by building code and TCNA standards. This slope is crucial for water to drain promptly and not puddle. In curbless showers, we coordinate with your contractor or plumber to recess the subfloor or use a pre-sloped shower base so we can achieve this slope flush with the main floor. If using a traditional mortar bed, we pack and form it to the correct pitch; if using a preformed foam pan (like Schluter’s shower tray), it comes pre-pitched for perfect drainage. We also ensure adequate blocking and support is in place for things like benches or glass door anchors so that nothing will loosen or flex down the road.
Waterproofing Membrane: Waterproofing is absolutely the foundation of a successful shower. Behind the scenes, every custom shower we build is completely wrapped in a waterproof membrane before any tile is laid. There are a couple of methods: one is a liquid-applied membrane that we paint/roll onto the walls and floor, and another is a sheet membrane (like the Schluter®-KERDI system or similar) that we bond to the walls and floor. We often prefer the sheet membrane systems for their reliability – for example, Schluter’s Shower System is a fully bonded, watertight assembly of wall boards, floor membrane, and sealing bands that tie everything together. This modern approach eliminates traditional failure points by keeping water from ever reaching the drywall, cement board, or subfloor beneath the tile. According to Schluter, their integrated system is leak-proof and mold-resistant, creating a long-lasting, healthy environment behind your tiles. In any case, we ensure that the waterproof layer is continuous: it runs up the walls (typically to the height of the showerhead or above) and overlaps seamlessly at corners and along joints. In fact, ANSI standards (A118.10) mandate that the membrane cover all changes of plane and extend to the full height of the tile assembly in showers. We go a step further by extending waterproofing beyond the shower a bit – for instance, on a curbed shower we might waterproof the bathroom floor 1 foot outside the shower, or on a curbless design we waterproof well past the shower door area. This extra diligence contains any splash or incidental water. Every penetration (like the mixing valve, showerhead arm, etc.) is carefully sealed with specialized covers or sealant (Schluter makes preformed Kerdi-Seals that we use, or we’ll use gaskets made for other systems) so that absolutely no moisture can sneak into the walls. By following these TCNA-recommended methods, we essentially create a waterproof “box” under the tile. You could take a fully waterproofed shower, fill it with water, and nothing would leak – that’s how robust our approach is.
Drainage & Pan Detail: We build the shower receptor (floor area) either using a traditional PVC liner with a mortar bed or more often using a surface waterproofing method with a bonding flange drain. In technical terms, TCNA has two main approved methods for curbless showers: B422 (with a bonded flange linear or point drain) and B421 (with a clamping-ring drain and liner). Both share the requirement of a properly sloped base and a depressed slab or substrate to accommodate that slope in curbless scenarios. When we install modern drains (like Schluter’s Kerdi-Drain), they allow us to bond the membrane directly to the drain flange, making a tight seal so all water goes down the drain where it belongs. We never rely solely on grout or tile to stop water – under the tile, the whole floor is a funnel toward the drain. Additionally, we ensure weep holes are protected (in clamping drains) or use the manufacturer’s integrated slope (in linear drains) so that even moisture under the tile can escape. In some special cases (large curbless showers), we might incorporate a secondary drain or channel outside the shower if needed, but typically a single, well-placed primary drain with correct slope and waterproofing is sufficient.
Backer Boards & Underlayment: Behind the shower walls, we use appropriate tile backer boards (such as cement board or proprietary waterproof foam boards). Cement board is a common choice – it’s dimensionally stable and not damaged by moisture. When using cement backer, we still apply the waterproof membrane over it since cement board itself is not waterproof (it won’t break down when wet, but it does let water through). Alternatively, we might use a waterproof foam board like Schluter®-KERDI-BOARD for the walls, which combines the backer and waterproofing in one step. These boards are made of extruded polystyrene foam and come already waterproof – we just seal the seams and screws. They have the advantage of being lightweight (no heavy cement boards to carry) and they will not foster mold or rot. Either way, the end result is a substrate that is flat, sturdy, and thoroughly protected from moisture. We also address critical joints – for example, where the wall meets the floor or where two boards meet – by using waterproof banding tape or fabric (like Kerdi-Band) to bridge seams. All corners get preformed corner seals or are carefully folded/painted to ensure there’s no pinhole left unsealed. This level of detail is what keeps your shower performing perfectly for decades, even with daily use.
Expansion Joints: As part of following ANSI standards, we also plan for movement joints in the tile assembly. Changes in plane (like wall-to-floor or wall-to-wall inside corners) are never hard grouted in a proper installation – instead, we use a flexible silicone or urethane caulk matched to your grout color. This allows a bit of expansion/contraction without cracking the grout. Likewise, if a very large shower or a long wall span is tiled, we might incorporate an expansion joint in the field (for extreme cases or per TCNA movement joint guidelines). These details ensure the tile can respond to building movements or temperature changes without issues, which is something a seasoned installer does that often goes unseen but preserves the integrity of your tile job.
In summary, a top-quality custom shower is as much about what you don’t see as what you do. We take pride in using the highest standards for shower construction – from proper slope and drains to complete waterproofing and movement accommodation. We strictly follow manufacturer instructions and TCNA/ANSI specifications at every step (for instance, all products are installed as per their ASTM/ANSI standards and the manufacturers’ guidelines, which is actually a building code requirement). This means your shower won’t leak, the tiles will stay bonded, and you won’t face mold or water damage down the road. Now, let’s look at the materials that go into setting the tile itself – the thinset mortars, trims, and grouts – and how each choice we make contributes to a superior finished product.
High-Quality Materials: Mortars, Profiles, and Grouts
A key sign of an educated tile contractor is their choice of installation materials. We insist on using professional-grade products (many from well-respected brands like Schluter® and MAPEI) that meet or exceed industry standards. Here’s an overview of the materials that make a difference in your custom shower:
Tile Adhesives (Thinset Mortars)

The strength and longevity of your tile work depend heavily on the mortar that holds the tiles in place. We use cementitious thinset mortars specifically engineered for the type of tile and substrate in your project. Not all mortars are the same – they have different bonding capabilities, flexibility, and suitable applications. Mortars are classified by ANSI standards such as A118.1 (unmodified dry-set mortar), A118.4 (polymer-modified mortar), and A118.15 (improved high-performance mortar). In simple terms, an unmodified mortar is basically cement and sand; a modified mortar has polymer additives that greatly enhance its bond strength and flexibility. The A118.15 mortars are the top-tier “improved” modified mortars with even higher bond strength requirements and performance in extreme conditions.
For a custom shower, we typically choose a polymer-modified thinset that meets at least ANSI A118.4, if not A118.15, because porcelain and glass tiles (commonly used in showers) demand a strong bond. For instance, when installing over Schluter’s Kerdi waterproofing, Schluter historically recommended an unmodified mortar (ANSI A118.1) for certain applications, but they have also developed their own modified mortars (like Schluter ALL-SET®) that are formulated to work with their membranes. As professionals, we stay updated on these recommendations and use the appropriate mortar so that warranties are maintained and performance is optimal. On shower walls, especially with large-format tiles (which are very popular now for their sleek look and easier cleaning), we use a non-sag, large-and-heavy-tile (LHT) mortar – these mortars are labeled with an “T” (for sag-resistance) and often “H” (for large/heavy tile) in their ANSI designations. That means when we press a big 24″ tile on the wall, it stays put and doesn’t slide down before it sets.
We mix all mortars exactly as per manufacturer instructions (using clean water, in the right ratio, and slaking/remixing as required) to achieve the correct consistency and performance. During installation, we use the proper trowel notch size to get excellent coverage on the back of each tile – industry standards call for at least 95% mortar coverage on tile in wet areas like showers (essentially no big voids under tiles where water could collect or impact could crack the tile). We also “back-butter” tiles when needed (spreading a thin layer on the back of large porcelain pieces) to ensure full contact. This meticulous approach with quality mortars means your tiles are securely bonded for the long haul. You won’t have tiles popping off or cracking due to hollow spots. And because we use mortars suited to the material (e.g., a special glass-tile mortar for glass mosaics, a rapid-set mortar if we need quick turnaround, etc.), you can trust that every tile – whether it’s a pebble floor or a marble accent – is installed with the appropriate technique. In short, we never skimp on the mortar; it’s literally the bedrock of a lasting tile job.
Finishing Edges with Schluter Profiles
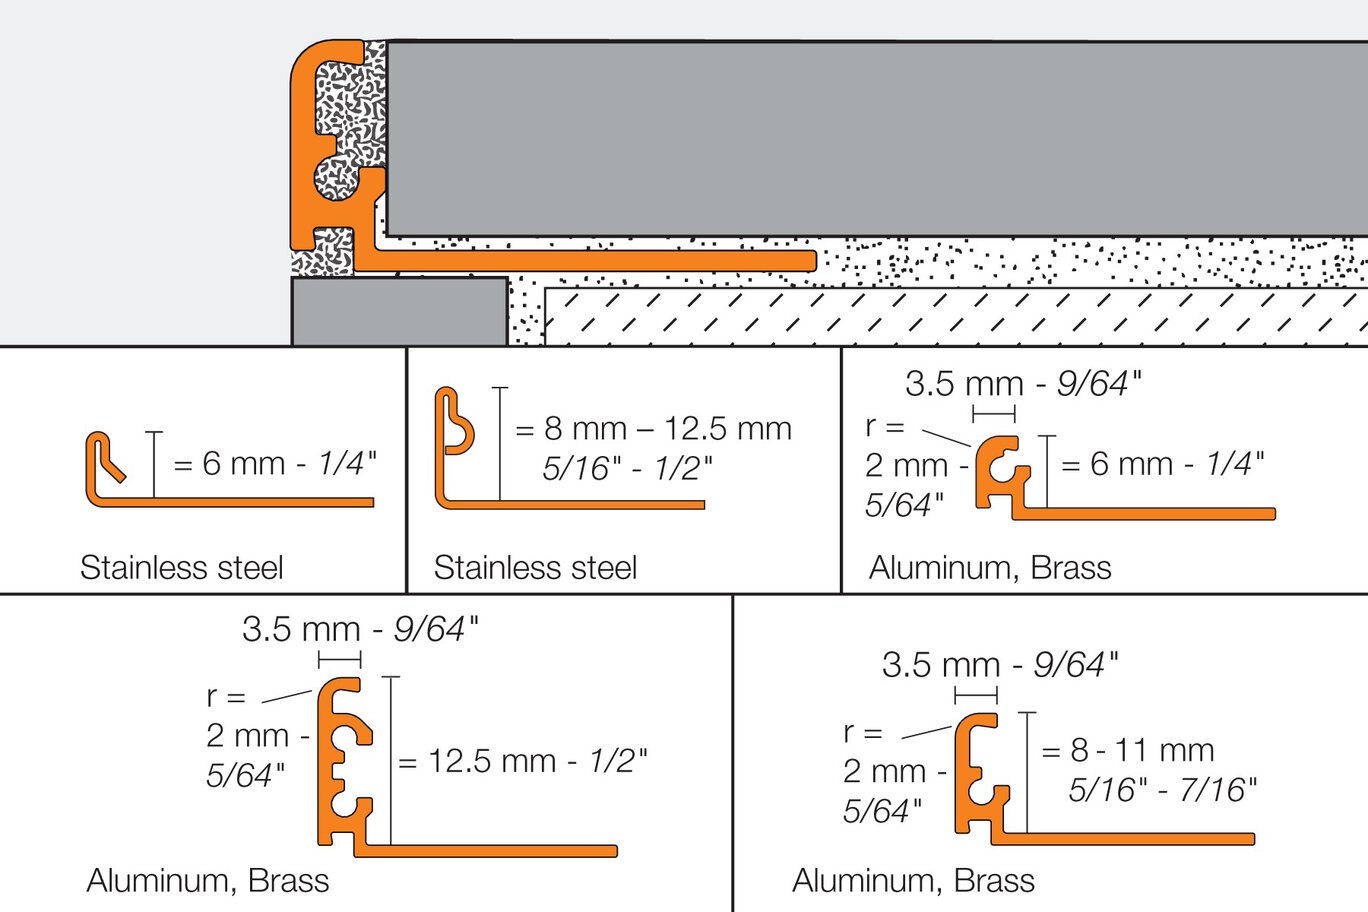
Tile edges and transitions are often overlooked, but they make a huge difference in the final appearance and durability of your shower. In older bathrooms, you might see tiles ending in a bullnose trim (a tile with a rounded finished edge) or worse, just a sharp exposed edge. In our custom showers, we typically use Schluter® profile trims to finish and protect tile edges for a clean, professional look. Schluter Systems makes a wide array of these trim profiles in metal and other materials designed specifically for tile work. They serve two main purposes: aesthetic enhancement and edge protection.
For example, Schluter®-RONDEC is a popular profile with a rounded quarter-circle reveal that can trim the outside corners of tiled walls or niches, giving a sleek framed look. Schluter®-JOLLY is a straight-edge profile that caps the tile edge at 90°, ideal for transitions or where tile meets paint. We select a profile shape and finish that complements your design – options include stainless steel, brushed nickel, matte black, brass, and various colors, so you can either have it blend in or make a statement. The benefit of these trims is not just looks: they protect the exposed tile edges from chipping or cracking by covering them with a metal (or PVC) edge. This is especially important for materials like porcelain or glass that can be brittle at the edges. Additionally, profiles create a seamless transition between tile and adjacent surfaces. For instance, at a shower entrance, a Schluter threshold profile can bridge the gap between the shower floor tile and the bathroom floor tile (or other flooring) at equal height, avoiding a tripping point.
We also use Schluter profiles inside niches and along shelves or benches. As mentioned earlier, trimming a niche with metal profiles not only looks sharp but also prevents water from infiltrating corners by covering the vulnerable grout edges. Profiles like Schluter®-DECO-SG even allow us to create channels for glass shower panels if doing a fixed glass without clamps – it’s a very clean way to secure glass. For floor-to-wall joints, Schluter makes cove-shaped profiles (DILEX series) that can replace caulk and give a sanitary coved transition – useful in certain continuous use showers or steam showers. While not every project uses all these profiles, we incorporate them where appropriate to ensure every edge in your shower has a polished, purpose-built finish rather than a rough or purely caulked edge.
Homeowners often comment that these trims give the shower a “magazine quality” detail. More importantly, they’ll keep the installation solid over time – tiles won’t have exposed edges to crack, and cleaning is easier with smooth profile corners. Schluter’s profiles and trims are part of our commitment to using the best materials: it shows that we sweat the details and deliver both beauty and substance in our craftsmanship.


Selecting the Right Grout (Using MAPEI for Performance)
Finally, let’s talk about grout, the material that fills the joints between your tiles. Grout color and quality has a big impact on the appearance of your shower and how it holds up over time. We primarily use MAPEI grouts, as MAPEI is a leading manufacturer with a full spectrum of colors and technologies to suit each need. Here’s an overview of the different types of grout and where each is advantageous:
Traditional Cementitious Grouts: These are the classic grout formulas made from Portland cement, available in sanded or unsanded versions. Sanded is used for wider joints (typically 1/8″ or more) and unsanded for narrow joints (1/16″ to 1/8″) to avoid scratching delicate tiles. Cement grouts are time-tested and cost-effective, but they are the most porous and prone to staining. In a shower, standard cement grout can absorb moisture and get discolored or support mildew if not maintained. We mitigate this by sealing the grout after it cures – an impregnating sealer helps reduce absorption. (Sealing is highly recommended for cement grout, and we will do it or advise you on doing it, typically 2-3 days after installation once grout has dried mapei.com.) MAPEI’s Keracolor® line is an example: Keracolor S (sanded) and Keracolor U (unsanded) are polymer-modified cement grouts we use for basic applications. They perform well when sealed and are a budget-friendly choice for walls or low-traffic areas. Expect that you might need to re-seal every year or two in a shower to keep cement grout looking fresh and resist stains.
High-Performance Cement Grouts: Newer technology has given us cement-based grouts that cure harder, denser, and with better water/stain resistance than the old kind. MAPEI Ultracolor® Plus FA is a prime example – this grout uses a special fast-setting cement with fine aggregate, and it’s an all-in-one replacement for sanded/unsanded grouts. Ultracolor Plus FA can handle joint widths from 1/16″ up to 3/4″, so one product covers all sizes. More importantly, it dries with a very dense, almost impermeable finish, which means it shrinks less, resists water and stains better, and retains color consistency well. In fact, while there is no sealer in it, its hardness and low porosity make sealing optional (though you still can for extra protection). We often use these high-performance grouts for floors and frequently-used showers because they give an extra margin of durability without moving to epoxy. One thing to note: they set up faster than regular grout, so they require an experienced hand for clean-up – which we’re prepared for. The benefit is you get a grout that’s tougher against mold and discoloration. Unless a client specifically requests a different type, we lean toward Ultracolor Plus FA for many custom shower installations because it means less maintenance and worry for you down the road.
Ready-to-Use (Premixed) Grouts: These are acrylic or urethane-based grouts that come pre-mixed in a bucket – no mixing with water required. MAPEI’s example is Flexcolor® CQ, which is an acrylic grout with colored quartz as the filler. The appeal of ready-to-use grouts is convenience and color consistency. There’s no chance of color variation from mixing with too much water, etc., and if you need to pause, you can close the bucket and continue later (the material stays usable). They also don’t require sealing, since they’re formulated to be non-porous once cured. We sometimes use premixed grout for small areas or repairs, or when a specific color effect is desired (Flexcolor CQ, for example, has a very uniform color and even a slight sparkle from the quartz, and MAPEI even has a Flexcolor 3D translucent grout for special decorative applications). However, premixed grouts have some limitations: many are not recommended for full immersion or constant water exposure (so we wouldn’t use them for swimming pools or maybe not for a steam shower without checking specs), and they can be tricky with certain tile types like porous natural stone or irregular shapes (some premixed grouts don’t love uneven grout lines like those in pebble floors). In general, MAPEI Flexcolor CQ is rated for showers and is actually a great choice for most residential shower walls and floors – it offers excellent stain resistance, maintains consistent color (the pigment is bonded to the quartz granules, so it can’t wash out or effloresce), and you can even add a sealer on top if you really want (though not usually needed). We’ll consider using a ready-to-use grout if it fits the project’s needs, especially if a client is concerned about grout color variation or wants to avoid any sealing maintenance. The cleanup of these grouts is a bit different (often you clean as you go, since they don’t get that cement haze), and we’re experienced with that procedure to ensure a beautiful finish.
Epoxy Grouts: Epoxies are the top-of-the-line grout option in terms of performance. They are made of resin and hardener that, when mixed, cure into an extremely hard, impermeable grout. Epoxy grout absorbs almost no water and is highly resistant to stains and chemicals – nothing much penetrates it. This makes it ideal for showers (and especially shower floors) where you want maximum protection against mold, mildew, and discoloration. In fact, epoxy grouts are often used in commercial kitchens, hospitals, or steam rooms due to their durability. In a residential custom shower, choosing epoxy grout means you essentially never have to worry about sealing your grout or seeing it turn funky colors over time. MAPEI’s epoxy grout product is Kerapoxy® (for example, Kerapoxy CQ is a newer epoxy grout with colored quartz filler for easier application). We might recommend an epoxy particularly for light-colored grout on a shower floor, since light grouts can show dirt – an epoxy will clean up like new every time. The trade-offs: epoxy grout is more expensive material-wise, and it requires a skilled installer because the working time is shorter and the cleanup needs to be precise. It has a different consistency (sticky) and we have to wash it with a special detergent solution to avoid any residue. Rest assured, our team is qualified to install epoxies – we’ve done many – but we generally use them when their benefits justify the added cost. Not every client needs an epoxy, since high-performance cement grouts do a great job in typical showers. But if you ask “what’s the absolute best grout for a shower that resists mold?”, epoxy is the answer – it’s the most water- and stain-resistant of all. One interesting point: epoxy grouts are so non-porous that you cannot even seal them (sealers won’t absorb) – they truly lock everything out. We will advise if an epoxy makes sense for your project (for example, if you have a curbless shower that you want to squeegee dry and keep absolutely pristine, or if you love a white grout but worry about upkeep).
No matter which type of grout we use, we’ll match it to your tile color scheme and practical needs. We also use proper techniques like packing the joints full (no half-filled grout lines), tooling them smooth, and curing them under the right conditions. If using cement grout, we do a controlled cure (avoiding overly fast drying) to maximize strength and minimize cracks. When it’s all done, we’ll walk you through any maintenance tips – for instance, if you have cement grout, periodic re-sealing is wise; if you have epoxy or Flexcolor, just gentle cleaning is fine (no harsh chemicals needed). Our goal is that your grout stays as beautiful as the tile, with minimal effort on your part. By using quality grouts from MAPEI and selecting the right formulation for each area (wall vs floor, glass tile vs porcelain, etc.), we ensure the finishing touch of your shower is both attractive and built to last.
Conclusion: Craftsmanship You Can Trust
Designing and building a custom shower is an involved process that marries creativity with technical precision. We’ve explored how thoughtful design features – like full-height tile, benches, curbless entries, and niches – can significantly enhance the luxury and functionality of your bathroom. Just as importantly, we’ve pulled back the curtain on the professional methods and materials that make those features work seamlessly for years to come: from following TCNA/ANSI standards for slope and waterproofing, to using Schluter® systems for a leak-proof installation, to selecting high-performance MAPEI grouts that keep your shower looking pristine.
When you hire an experienced, knowledgeable contractor (like us), you’re not only getting a beautiful design – you’re getting peace of mind. Every choice we make is rooted in years of tile-setting expertise and continuous education in industry best practices. We know what questions homeowners often have (or should have) about showers: “Will it leak? Is this tile slippery? How do I clean the grout? What if I want aging-friendly features?” Our approach, as you’ve seen, is to address those questions upfront through intelligent design and quality installation. For example, by using a bonded waterproof membrane and proper slope, we’ve already answered “will it leak?” with a resounding no, it’s built not to; by using slip-resistant mosaics on the floor and offering grab bar reinforcement, we’ve ensured your shower is safe as well as stylish. By choosing the right grout and sealer, we’ve made it easy to keep clean. In essence, we think of everything so you don’t have to worry.
We hope this deep dive has been informative and demonstrates the level of professionalism and care we bring to our custom shower projects. An educated client is the best client – you now have insight into why certain features matter and how a proper shower should be built. When we come to do your in-home estimate, you can feel confident asking about the TCNA standards or the type of waterproofing we’ll use, and you’ll understand the reasoning behind our recommendations. Our goal is to deliver a stunning shower that exceeds your expectations in both looks and performance. It’s the little details, from design tweaks to the brand of mortar under the tiles, that differentiate a mediocre job from an excellent one. We take pride in doing it right the first time and creating a bathroom that you will love and rely on daily.
Ready to discuss your dream shower? We’re here to answer any further questions and guide you through the process. With the combination of creative design and rock-solid execution, we’ll help you achieve a custom shower that is truly the jewel of your bathroom – a space that delights you every time you step in, and one that stands the test of time. Let’s build something beautiful together, backed by the assurance of proven methods and an expert hand at every step. Your new oasis awaits!
Sources: Relevant industry standards and guidelines have been referenced from the Tile Council of North America Handbook, ANSI specifications, and National Kitchen & Bath Association recommendations to ensure accuracy and reliability of the information provided. Additionally, product-specific insights from Schluter® Systems (for waterproofing and trim profiles) and MAPEI (for grout technologies) are included to highlight their benefits in a real-world context. These practices and materials collectively contribute to a top-quality custom shower installation that you can trust for years to come.
Want more Information on Bathroom Remodeling? Read this helpful guide to bathroom Remodeling in Lancaster PA.
Looking for other Shower options? Read about our 3 day Showers in Lancaster PA.