

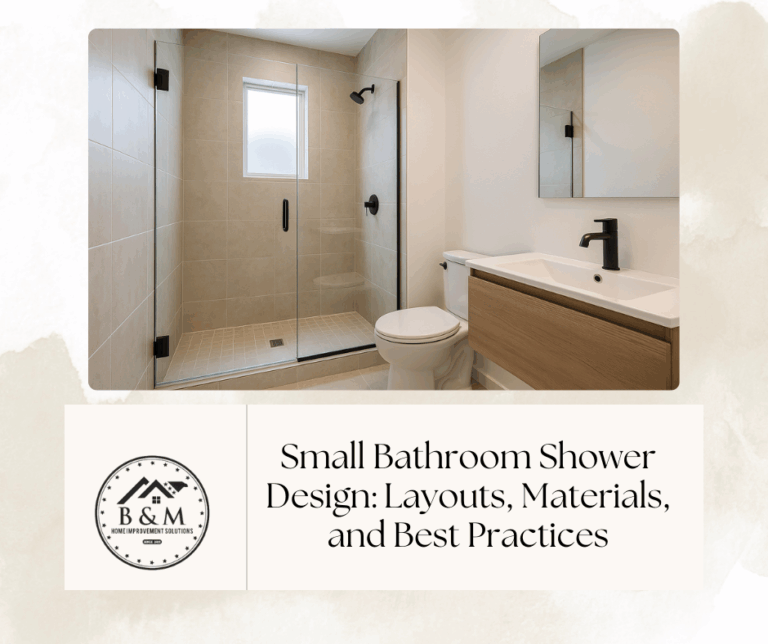
Small Bathroom Shower Design: Layouts, Materials, and Smart Tricks for Tight Spaces
Last updated: September 2025 • Serving Lancaster & York County, PA
Small bathroom shower design doesn’t have to feel like a compromise. With the right layout, materials, and water-management details, a 5×8 or 6×9 bath can deliver a private, luxurious shower that’s easy to clean and built to last. This guide walks homeowners—especially those unsure where to start—through the major choices and tradeoffs so you can evaluate bids confidently and understand why quality work costs more (and saves you headaches later).
If you’re comparing systems or planning a replacement, you may also find these helpful:
What “Small” Usually Means—and Why It Matters
In older homes across Lancaster and York, the most common footprints we see are 5 ft × 8 ft and 6 ft × 9 ft. These rectangles place tight limits on clearances, door swings, and where water wants to go. Your plan has to do three things at once:
Protect the room from water (smart pan/membrane details, good glass strategy, ventilation).
Preserve walk paths and minimum code clearances so the room feels safe and usable.
Capture every inch of shower footprint without boxing the space in.
Keep the following baseline clearances in mind as you evaluate layouts (always verify locally):
Shower interior minimum: 30″ × 30″ (larger is nicer).
Clear space in front of shower entry: 24″ minimum.
Toilet side clearance: 15″ from center to any obstruction (30″ total).
Clear space in front of toilet or lavatory: 21″ minimum.
These numbers shape every decision that follows.
Should You Keep the Tub? (Usually: Skip It)
Most families use the shower daily; the tub collects dust. When square footage is tight, skipping the tub often returns 12–18″ of usable shower width and allows a more comfortable vanity/toilet arrangement. If a resale-driven “one tub in the house” requirement applies, consider keeping a tub in another bathroom and optimizing this room for a stand-alone shower.
Three Proven Layout Strategies for a Small Bathroom
1) The “Wet-Zone” or Curbless Shower (Euro-style)
What it is: The room floor slopes to a drain; there’s no curb at the shower boundary. You control splash with glass splash panels and placement, not with a framed enclosure.
Why it’s great in small rooms
No curb means uninterrupted floor and a visual expansion of the space.
Accessibility is built-in—ideal for aging in place.
A single floor finish and linear drain can look sleek and modern.
Design tips
Put the shower at the far end of the room; keep the entry and vanity in the “dry” zone.
Add a tempered glass splash wall beside the vanity or doorway (height to the showerhead; depth matched to the fixture it shields).
Store towels/toilet paper outside the spray path; consider stainless or solid-surface shelves.
Tradeoffs
It’s typically the most expensive option: floor re-sloping, bigger waterproofing scope, and more tile work.
Everything in the room must tolerate some moisture (tile wainscot or solid-surface wall protection is smart).
2) Curbed Shower, Door Optional
What it is: A standard shower pan with a low curb defines the wet area; kneewalls or a full-height glass panel control spray. With a single showerhead aimed away from the opening, many curbed showers can go door-less.
Why it works
You gain splash control without making the room feel sealed off.
Kneewalls (≈36″ tall) give privacy, back-painted glass above them brings light, and you still preserve elbow room.
Sizing guidance
We’ve built them as tight as 32″ wide in extreme cases, but 36″–42″ feels much better.
Put the valve near the opening so you can warm the water before stepping in.
When to add a door
Multiple showerheads, body sprays, or a handheld aimed toward the opening usually require a glass door to keep water in.
Always hinge the door on the showerhead/valve side; you can reach the controls without getting soaked, and the door seals better against directed spray.
3) Neo-Angle (Clipped Corner) Shower
What it is: A shower with one corner “clipped,” creating a diagonal door opening. In a square 6×6 room—or any plan where three fixtures cluster—this can unlock real circulation space.
Pros
The diagonal entry clears the vanity/toilet zone and eases door conflicts.
Works with custom mortar pans or off-the-shelf acrylic pans (the latter limit size choices, but cost less).
Cons
Custom glass can be pricier; stock neo-angle kits fix dimensions and drain locations.
You’ll need to be meticulous about door swing and spray direction to avoid leaks.
Materials for Small Bathroom Showers: What to Use (and Why)
Solid-Surface Panels (Our Favorite for Tight Rooms)
Engineered, non-porous panels deliver the look of stone without the grout grid. They’re bonded with 100% silicone over a prepared substrate and can be scribed tight to wonky plaster walls—common in older Lancaster homes.
Why they shine in small baths
Few seams → fewer places for water to hide.
Fast install (often 2–3 days) → less disruption.
Easier cleaning than mosaic tile.
Corner trims, niches, and benches are part of the system.
Pair with: A matched shower base (low threshold) and frameless glass hinged on the valve side.
Learn more: Solid-Surface vs. Tile
Custom Tile
Tile is the most flexible visually—mosaics, borders, patterns—but requires a correct membrane and more ongoing care.
When it’s worth it
You want a one-of-a-kind look and don’t mind grout maintenance.
You need a fully custom pan (wet room, irregular shape, or linear drain).
Small-bath tip
Favor larger formats on walls to reduce grout lines; use mosaics only where needed for slope/traction.
Acrylic/Fiberglass Units
Budget-friendly and fast, but restricted to stock sizes and less durable long-term.
When to consider one
Rental or secondary bath where speed and cost trump customization.
You can live with the exact footprint it offers (often deeper than a custom pan, which can crowd the room).
Privacy Without Claustrophobia: Walls, Kneewalls, and Glass
Small baths need privacy and light. Mix these elements to balance both:
Full-height tiled walls offer maximum privacy but use 5″+ of interior width—precious inches in a compact shower.
Kneewalls (~36″ tall) with glass above keep water in while maintaining sightlines and daylight.
All-glass partitions take the least space and keep the room bright, especially helpful with a single small window.
Splash panels (tempered glass without a full enclosure) are perfect for curbless designs.
Door hardware & swing
Specify a hinge on the showerhead/valve side, opening out. This lets you adjust the water before entry and reduces spray escaping at the hinge side.
Benches, Niches, and Where to Put Them
Benches: If the shower is <48″ long, consider a corner bench or a fold-down seat; both save floor space. In bigger footprints, a 12–15″ deep bench along the back wall is comfortable and useful for shaving and storage.
Niches: Place niches out of the direct spray (adjacent wall works well). In solid-surface systems, integrated shelves are easy to squeegee and won’t collect grime like mosaic niches.
Ventilation, Lighting, and Everyday Comfort
Ventilation: A quiet fan, properly ducted to the exterior, protects finishes and keeps mirrors clear. Consider a humidity-sensing control so the fan runs long enough.
Lighting: Layer task (over vanity), ambient (ceiling), and accent (niche or toe-kick) light. In showers, use wet-rated fixtures.
Heated floors: Tiny rooms heat quickly with radiant mats and transform cold tile in winter.
Storage: Recessed medicine cabinets, shelf towers outside the splash zone, and hooks behind the door keep the footprint tidy.
“Small Bathroom Shower Design” Examples That Work
5×8 Classic Upgrade (Tub Removed)
Shower: 36″–42″ wide, curb or curbless at the far end, glass panel toward the room.
Toilet: Centered in a 36″ compartment (15″ each side; 21″ clear in front).
Vanity: 24″–30″ wide near the door; pocket or outswing door to preserve clearances.
Why it feels big: No tub, smart glass, and a single tile/solid-surface finish make the room read wider.
6×9 With Door-less Curbed Shower
Shower: 42″ × 48″ inside; kneewall and fixed glass protect the dry zone.
Valve: Near the opening to preheat water.
Storage: Recessed niche on the long wall, bench on the short wall opposite spray.
Why it works: The opening sits outside the spray cone, so no door required.
6×6 Neo-Angle
Shower: Custom neo-angle with linear drain; glass door opens toward the valve.
Toilet & vanity: Tuck into the two remaining corners; the diagonal entry clears both.
Why it works: The clipped corner shortens walk paths and eliminates door collisions.
Waterproofing & Risk Management (Where Premium Work Earns Its Keep)
Whatever system you choose, durability depends on the details you can’t see:
Substrate correction: Plumb/flat walls before panels or tile.
Pans & drains: Correct slope, supported base, protected weep holes (for tile pans).
Membranes: Continuous waterproofing with manufacturer-approved overlaps and penetrations.
Penetrations: Seal every screw and accessory with 100% silicone (or system-approved sealant).
Glass planning: Door swing and hardware locations that avoid direct spray at seams.
Documentation: Photos of waterproofing, product data sheets, and care instructions—kept on file.
This is where premium labor, schedule discipline, and warranty support live. It’s also why two bids with the same square footage can be thousands of dollars apart.
Budget & Timeline: What to Expect in a Small Bathroom
Curbless/wet room: Highest waterproofing scope; usually the longest timeline.
Curbed, door-less: Middle ground; fast to clean and typically quicker to build.
Neo-angle with stock pan: Often the budget-friendliest path to a real shower in a tight square footprint.
For line-item examples and the factors that push numbers up or down, see Shower Replacement Cost—Lancaster, PA.
How to Compare Bids (Even If You Don’t Pick Us)
Ask each contractor to answer, in writing:
What’s the waterproofing method? (brand/system, not just “tile backer.”)
How is the pan built or set? (slope, support, and drain details.)
Where does the door hinge? (it should be on the valve side; confirm swing).
Are walls corrected for plumb/flatness? (how will they prove it?)
What’s sealed and how? (penetrations, accessories, niches).
What ventilation is included? (CFM, exterior venting).
What’s the daily protection/cleanup plan? (containment, runners, HEPA vacs).
What’s the warranty and service policy? (labor + materials; response timeline).
What documentation do we get? (behind-the-wall photos, models/serials, care guide).
Good pros love clear scopes—it protects you and them.
Quick “Small Bathroom Shower Design” Checklist
□ Confirm code minimums (30″×30″ shower, 24″ clear at entry, 15″ toilet side, 21″ front clearances).
□ Decide curbless, curbed door-less, curbed with door, or neo-angle.
□ Choose solid-surface, tile, or acrylic based on maintenance and budget.
□ Fix plumb/flat and plan blocking for bars/benches.
□ Hinge glass door on the valve side; verify swing and clearances.
□ Add ventilation, layered lighting, and reachable storage.
□ Get a line-item estimate and compare apples-to-apples.
Next Steps
Want help turning your specific 5×8 or 6×9 into a real plan? Send us your measurements and we’ll sketch two to three layout options that meet code and feel comfortable—plus a realistic schedule.
Compare systems: Solid-Surface vs. Tile Showers
Understand budgets: Shower Replacement Cost—Lancaster, PA
See finishes in person: Top Kitchen & Bath Showrooms in Lancaster
Get a measured, line-item estimate: Contact B&M Home Improvement Solutions