

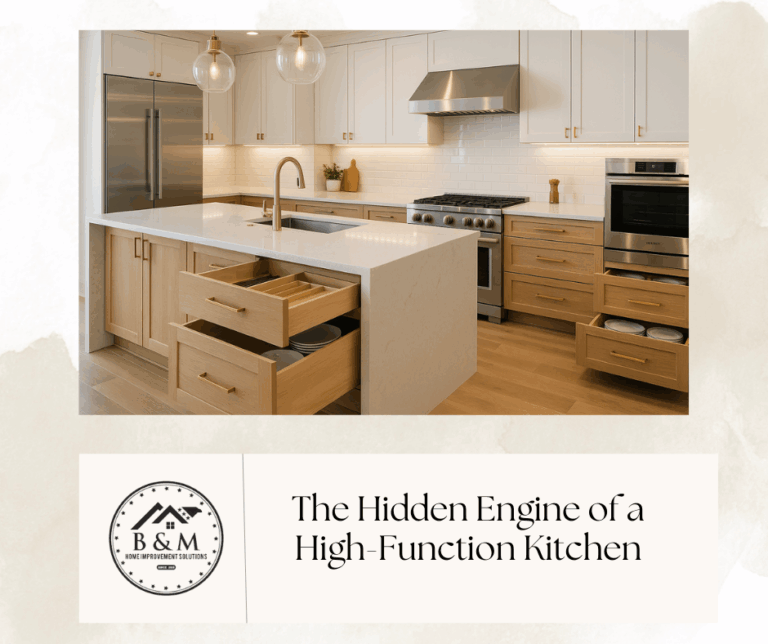
The Hidden Engine of a High-Function Kitchen: Cabinet Interiors + A Real-World Timeline for Lancaster & York, PA
A beautiful kitchen is easy to admire; a high-function kitchen is easy to live in. The difference is almost never the door color—it’s the cabinet interiors, smart electrical, and a well-managed timeline that turns design into daily ease. This in-depth guide combines two topics homeowners in Lancaster and York, PA ask us about most:
what to put inside your cabinets to make life simpler, and
how the kitchen remodel process actually unfolds—without budget surprises or delays.
We’ll walk zone by zone through inserts, dividers, lighting, and hidden power solutions that change how your kitchen works. Then we’ll map the project from discovery to your first dinner in the new space, explaining who does what and when—so you can plan with confidence.
Who This Guide Is For
Homeowners planning a remodel in Lancaster or York who want custom function without guesswork.
Cooks who are tired of digging for lids, sheet pans, spices, and small appliances.
Anyone who’s been burned by vague timelines and wants a clear, realistic sequence from design → ordering → install.
How a Kitchen Project Really Flows (From Idea to Dinner)
A smooth kitchen remodel isn’t “demo day and hope.” It’s a sequence with dependencies. Here’s the blueprint B&M Home Improvement Solutions uses on projects throughout Lancaster and York.
1) Discovery & Planning (1–3 weeks)
Goals & budget bands: Refresh vs. replace vs. reconfigure.
Measure & photos: We document structural quirks common in local homes (out-of-plumb walls, sloped floors).
Scope guardrails: We define what stays, what moves, and what needs trades (electrical, plumbing, HVAC).
2) Schematic Design & Appliance Lock (2–4 weeks)
Layout options: Work triangle vs. zone planning for cooking, prep, cleanup, and storage.
Appliance specs locked: Ranges, hoods (CFM, duct path), panel-ready refrigeration, microwave drawers.
Rough MEP planning: We mark outlet counts, dedicated circuits, water lines, and ventilation routes.
3) Selections & Cabinet Engineering (3–6 weeks)
Cabinet line & construction: Semi-custom or custom; ¾” plywood boxes, full-extension, soft-close hardware.
Door style & finishes: Paint/stain, conversion varnish, sheen.
Interior kit: Inserts, organizers, lighting, and hidden power (more below).
Counters & splash: Stone, quartz, or porcelain slab; edge profiles; slab approvals.
Sign-off set: Final drawings, elevations, and an itemized specification list.
4) Ordering & Lead Times (6–12+ weeks, varies by line)
Cabinet production: The longest lead. We start scheduling trades the day we get confirmed ship dates.
Long-lead fixtures: Sinks, faucets, lighting, pulls/knobs, ventilation, and any specialty hardware.
Stone slab holds: We tag slabs early so the exact lot you approved is the one we fabricate.
5) Site Readiness (1 week)
Protection: Dust control, floor protection, and temporary sink setups where possible.
Staging: We receive and check components so install can run without parts hunts.
6) Demo & Rough-Ins (1–2 weeks)
Demolition: Walls opened where needed for clean, code-compliant wiring and plumbing.
MEP rough: Dedicated circuits for appliances, island power, GFCI/AFCI, water lines, gas (if applicable), and hood ducting.
Framing & blocking: In-wall blocking for future accessories (towel bars, grab bars), hood supports, floating shelves.
7) Floors & Walls (varies by material)
Subfloor & leveling: Critical for clean cabinet reveals and quiet floors.
Flooring: Wood, LVT, or tile; radiant heat where specified.
Prime & paint first coat: Especially behind tall units and the range area.
8) Cabinet Installation (3–7 days, scope dependent)
Set boxes dead level: Shim and scribe to local wall/floor conditions.
Tall & appliance runs: Plumb and locked, panels templated.
Interior hardware & lighting: We prewire low-voltage tape and switch placements as planned.
9) Countertop Template → Fabrication → Install (7–14 business days typical)
Template after cabs set: Sink, faucet, and cooktop cutouts verified.
Seam placement & overhangs: Approved to match your aesthetic and slab patterning.
Install: Dry fit, silicone, and rapid-set adhesives with proper support.
10) Tile & Finish Carpentry (2–5 days)
Backsplash or slab walls installed after counters.
Trim, panels, shoe molding, crown set and tuned for tight joints.
11) Appliances, Fixtures, & Final Electrical (1–3 days)
Set & connect: Ranges, ovens, refrigeration, DW, micro drawers, hoods.
Fixture set: Faucets, garbage disposal, instant hot, filtration.
Lighting scenes: Program under-cabinet, toe-kick, and in-cabinet LEDs.
12) Commissioning, Clean, & White-Glove Punch (2–5 days)
System checks: HVAC make-up air if required, ventilation capture tests, DW panel alignment.
Owner orientation: Care for tops/finishes, how to adjust soft-close, filter schedules.
Punch list: We aim to hand you a zero-drama final walkthrough.
Timeline reality: The calendar is driven by selections made early and cabinet lead times. When clients approve quickly and we lock appliances up front, projects run predictably.
Cabinet Interiors 101: Build the Box Right First
Before inserts, get the bones right—because durable construction keeps drawers running true for decades.
Box material: ¾” plywood (multi-ply) with glued/doweled or confirmat fasteners. Furniture board is budget-friendly but can swell if wet.
Backs & shelves: ½” full backs improve rigidity; adjustable shelves should be ¾” thick to resist sagging.
Drawers: Solid wood or high-grade plywood with dovetail joinery, undermount full-extension slides (soft-close, 75–100 lb rating).
Hinges: Soft-close, six-way adjustable, clip-on concealed hinges.
Finish inside: UV-cured clear or durable melamine for wipe-clean interiors.
Sink base protection: Drip tray or integrated pan to catch small leaks.
These specs are our starting point on semi-custom and custom projects; from there we tailor interiors to how you cook, store, and entertain.
Zone Planning: Inserts & Organizers That Change Daily Life
Prep Zone (between fridge and sink)
Knife drawers with removable blocks protect edges and keep the counter clear.
Cutting-board pullouts sized to your favorite board; add a trash pull within one step.
Spice/seasoning storage in a tiered drawer rather than a narrow pullout near a hot range; herbs and oils fare better away from heat.
Shallow utensil drawers with adjustable dividers for peelers, thermometers, and small tools.
Why it matters: The fewer steps between fridge → sink → board → trash, the faster dinner goes.
Cooking Zone (range/cooktop wall)
Deep drawer stacks (10–12″) for pots/pans directly under the cooktop; lid organizers vertically file lids so they don’t tangle.
Tray dividers (vertical) for sheet pans, cooling racks, cutting boards—best in a 9–12″ wide tall cabinet or above the oven.
Spice & oil pullouts flanking the range are fine if you cook frequently; otherwise, keep perishables in a cooler zone.
Pot filler is optional; if you add it, plan shutoffs and drip control.
Ergonomic pro tip: Drawers beat doors for pots and pans—no crouching, full visibility.
Cleanup Zone (sink & dishwasher)
Double trash/recycling pullout, 18–21″ wide, on heavy-duty slides; add a compost caddy with a lid if you garden.
Under-sink rollouts for detergents and towels; install a leak sensor tied to smart home alerts.
Cutlery organizers near the dishwasher to speed unloading; add a knife honing slot if you sharpen at home.
Sink base note: Consider a workstation sink with integrated ledges for colanders and drying racks—turns cleanup into usable counter.
Baking & Small Appliance Zone
Mixer lift (with soft-close) in a 18–21″ base keeps a stand mixer at the perfect height.
Baking pan dividers next to the oven for half sheets and muffin tins.
In-drawer power for hand mixers and scales; cord remains hidden and ready.
Coffee/Beverage Zone
Pod/tea drawers with adjustable dividers.
Shallow cup shelves behind fluted or reeded glass to display without dust.
Plumbed water for espresso if the layout allows; otherwise, build a fill station nearby.
Undercounter beverage center on a dedicated circuit to avoid nuisance trips.
Pantry Strategy
Roll-out trays at all levels (4–5 trays in a 24–30″ pantry).
Shallow pantry (12–15″ deep) reduces food lost to the back; we use two tall units rather than one deep cave.
Bulk bin pullouts for flour, rice, or pet food with gasketed lids.
Corner Solutions (No More Dead Space)
LeMans swing-outs bring pots fully into the aisle from blind corners—no crawling.
Super Susan (two independent rotating shelves) beats a center-post Lazy Susan for access and weight.
Angled tray cabinet at the corner of a range run for baking sheets and boards.
Tall Utility & Mudroom Adjacent
Broom/vacuum cabinet with a built-in outlet and hooks—no more trapped cords.
Charging locker with cubbies and USB-C/AC power behind a door to hide device clutter.
Toe-Kick Storage
Toe-kick drawers under a baking zone store platters and sheet pans; soft-close so they don’t feel “gimmicky.”
Hidden Power, Done Right
Functional kitchens hide power in clever places—safely and to code.
In-drawer/outlet strips: UL-listed, GFCI-protected where required. Perfect for blenders, hand mixers, and charging.
Pop-up outlets on islands keep counters clean while meeting code spacing; retract when not in use.
Under-cabinet raceways feed lighting and small appliance plugs cleanly without outlet clutter in the backsplash.
Dedicated circuits: MW drawer, DW, disposal, fridge, beverage center, and any steam ovens.
Island power planning: Conduit paths set before flooring; we verify panel capacity early to avoid rework.
Lighting Inside and Out
Good light turns storage into usability and sets the mood.
Under-cabinet LEDs: Continuous tape with diffusers (no “dotty” glare). 2700–3000K, 90+ CRI.
In-cabinet lights: Auto-switch pucks or linear strips in glass uppers; drawer lights that activate on open.
Toe-kick LEDs: Night path and soft evening ambiance on its own dimmer.
Task pendants: Size by island length; center them over work, not just visually.
Materials & Mechanisms That Last
Slides: Undermount, full-extension, soft-close, 75–100 lb. Pan drawers often spec 100 lb.
Hinges: Clip-top soft-close with quick release for cleaning.
Shelves: ¾” adjustable with metal pins; heavy zones get center support.
Finishes: Conversion varnish for painted doors; durable, repairable, and resistant to household chemicals.
Moisture planning: Aluminum toe-kick behind painted shoe molding near dishwashers and sinks.
Ergonomics & Aging in Place (Without Looking Clinical)
More drawers, fewer doors for heavy items; waist-high access saves joints.
Pulls over knobs for easier grip with arthritis.
Wall-oven stacks with side-swing doors keep lifting safe.
Curbless thresholds to adjacent mudroom or deck so trays and carts roll smoothly.
Future-proof blocking behind walls for discreet grab-bar installs later.
What Drives Cost (and How to Control It)
Budget levers live in three buckets: scope, finishes, and sequence.
Scope: Moving plumbing/gas, adding windows, or deleting walls triggers structural, electrical, and permit work. If the layout works, keep services in place and invest in interiors and lighting.
Finishes: A slab backsplash and waterfall edges add fabrication time and support, but can be surgical upgrades with big visual payoffs. Pick one or two statement moments and keep the rest classic.
Sequence: Late appliance swaps or tile changes cause re-draws, re-orders, and delays. Lock selections early; we maintain a decision calendar so nothing is last-minute.
Pitfalls That Blow Timelines—And Our Fixes
Late appliance decisions: We lock SKUs during schematic design so cabinet engineering is correct the first time.
Under-spec’d ventilation: We size CFM to the cooktop and plan a straight, short duct to keep hoods quiet and effective.
Out-of-plumb walls/floors: We expect them in older Lancaster homes; our installers carry scribe fillers and laser levels to keep reveals even.
Waiting to order long-lead items: We order the day you approve the spec set; no “we’ll get to it” lag.
No contingency: We recommend a 10% contingency; if you don’t need it, great—you’ve just funded the “nice-to-have” you wanted.
Week-by-Week Snapshot (Typical Moderate Remodel)
Weeks 1–3: Discovery, measure, budget bands, schematic layout.
Weeks 4–7: Selections, cabinet engineering, appliance lock, spec sign-off.
Weeks 8–16+: Manufacturing & ordering; site readiness near the end of this window.
Week 17: Demo & rough-ins.
Week 18: Flooring, wall prep, first coat paint.
Week 19: Cabinet set, interior hardware, low-voltage lighting.
Week 20: Counter template; tile prep.
Week 21: Counter install; then backsplash.
Week 22: Appliances, plumbing trim, final electrical, lighting scenes.
Week 23: Commissioning, deep clean, white-glove punch, orientation dinner.
Your exact timeline may compress or extend based on scope and lead times, but the order above is the backbone.
Lancaster & York Considerations We Plan Around
Historic quirks: We pre-plan scribes and custom fillers so two-tone reveals look dead even in older farmhouses and colonials.
Basement panels: Plenty of homes have older service panels; we coordinate electricians early to add circuits for modern kitchens.
Supply network: We source plumbing, substrates, and select materials through Hajoca, Red Rose Cabinetry, Lezzer Lumber, and Too the Trades—partners we trust for consistent quality.
Winter installs: If you’re planning radiant heat or tile in winter, we schedule proper curing windows and climate control.
Sample Interior Package (Easy to Hand to Your Designer)
Cabinet construction: ¾” plywood boxes, dovetail drawers, undermount full-extension soft-close slides.
Sink wall: 21″ double trash pull + 12″ detergent pull; under-sink rollout; drip tray; leak sensor.
Range wall: 36″ deep drawer stack under cooktop with lid organizer; 12″ tray divider; spice drawer tier.
Island: 24″ mixer lift; two deep drawers for mixing bowls and small appliances; drawer power for a hand mixer and scale; pop-up outlet on the top.
Pantry: 30″ with five full rollouts; 15″ shallow pantry for snack visibility.
Coffee bar: 18″ drawers for pods/tea; under-cabinet outlet raceway; glass uppers with in-cabinet lighting.
Lighting: Continuous under-cabinet LED tape (90+ CRI); toe-kick night lights on a separate dimmer; drawer lights at baking zone.
Finishes: Conversion-varnish paint on doors; UV-cured clear interiors.
Why Work With B&M Home Improvement Solutions
We’re a design-build team serving Lancaster and York that treats your kitchen like a system, not just cabinetry. We coordinate design, selections, ordering, trades, installation, lighting, and punch-out under one accountable roof. You get:
Predictable timelines anchored to real cabinet lead times.
Cabinet interiors tailored to your routines, not a catalog.
Tight, beautiful installs that hold their lines in real-world homes.
Trusted suppliers and seasoned trades for a smooth path from permit to plate.
Ready to Plan Your Kitchen the Right Way?
Book a design consultation and we’ll build your interior kit and project timeline together—so when demo starts, every piece is ready and every step is clear. We’ll show you two or three interior packages, with pricing ranges, and a calendar that ends with your first dinner in a kitchen that finally works like it looks.
Serving: Lancaster, York, and surrounding communities.
B&M Home Improvement Solutions — custom kitchens and baths, expertly delivered.
FAQs We Hear All the Time
Yes—daily reach items (trash, spices, pots, cutlery) pay for themselves in the time you save every single day. Start with trash/recycling, deep drawers, tray dividers, and a cutlery/utensil system. Add a mixer lift and drawer power if you bake.
Drawers for 80% of storage; doors only where you need tall vertical items (sheet tray divider, tall stock pot) or sink bases. Drawers give full, ergonomic access.
Not necessarily. A shallow pantry (12–15″ deep) with rollouts beats a single deep cave. If space is tight, two 15″ pantries flanking the fridge can outperform one 24″ box.
Layout first, appliance lock second, cabinet engineering third. Changing appliances later cascades re-draws and delays.
Use an under-cabinet raceway and place outlets horizontally low on the wall or in pop-ups on the island to maintain a clean slab or tile pattern.
Plan zones: beverage/coffee away from the cooking path, second dishwasher if budget allows, and a 48″ or double-island layout where the aisle width supports traffic (42–48″).
Add in-wall blocking, circuits with a little headroom, and more drawers. Choose durable finishes and classic door styles; change hardware later for a quick refresh.