Best Waterproofing System for your shower Installation-- How to Guide for Shower Waterproofing Installation.
– Importance of proper shower tile installation
– Overview of the installation process
– Importance of following manufacturer’s instructions
II. Pre-Installation Preparation
A. Assessing the Shower Area
– Measuring the shower area
– Determining the layout and design
– Checking the existing subfloor or concrete slab
B. Gathering Materials and Tools
– List of necessary materials
– Tools required for installation
C. Surface Preparation
– Preparing the subfloor or concrete slab
– Repairing any damage or imperfections
– Ensuring a level and stable surface
III. Waterproofing the Shower
A. Choosing the Waterproofing System
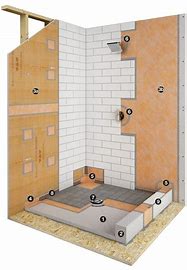
– Introduction to Schluter tile shower systems
– Benefits of using a waterproofing membrane
– Selecting the appropriate Schluter waterproofing products
B. Applying the Waterproofing Membrane
– Preparing the walls and floor for membrane installation
– Applying the waterproofing membrane to the walls
– Installing the membrane on the shower floor
– Overlapping seams and reinforcing corners
IV. Installing the Shower Tray and Drain
A. Selecting the Shower Tray and Drain System
– Understanding different types of shower trays
– Choosing the appropriate Schluter drain system
– Ensuring compatibility between the tray and drain
B. Installing the Shower Tray
– Preparing the subfloor or concrete slab for tray installation
– Securing the shower tray in place
– Ensuring proper slope for drainage
C. Installing the Drain System
– Connecting the drain to the waste pipe
– Attaching the drain grate
– Waterproofing the drain connection
V. Tile Installation
A. Selecting Tiles and Setting Materials
– Choosing the right tiles for the shower
– Exploring various tile setting materials
– Ensuring compatibility between tiles and setting materials
B. Preparing the Surface for Tile Installation
– Cleaning the waterproofing membrane
– Checking for any imperfections
– Applying a primer if necessary
C. Installing Tiles on the Walls
– Preparing the thin-set mortar
– Spreading thin-set mortar on the wall
– Placing the tiles and ensuring proper spacing
– Cutting tiles to fit around obstacles
D. Installing Tiles on the Shower Floor
– Preparing the thin-set mortar for the floor
– Applying thin-set mortar on the floor
– Installing tiles and ensuring proper alignment
– Cutting tiles to fit around the drain
VI. Grouting and Finishing
A. Mixing and Applying Grout
– Selecting the appropriate grout type
– Mixing the grout to the proper consistency
– Applying grout to the tile joints
– Cleaning excess grout from the tile surface
B. Sealing the Tiles (if necessary)
– Understanding the need for tile sealing
– Choosing the appropriate sealer for the tiles
– Applying the sealer according to the manufacturer’s instructions
C. Final Touches and Clean-Up
– Inspecting the installed tiles for any issues
– Making necessary repairs or adjustments
– Cleaning the shower area and removing any debris
VII. Maintenance and Care
– Proper maintenance practices for tile showers
– Cleaning and preventing mold and mildew
– Regular inspections and repairs
VIII. Conclusion
– Recap of the shower tile installation process
– Importance of following proper installation guidelines
– Enjoying your newly installed shower tile system
Remember, this is just an outline to guide you in creating a comprehensive shower tile installation guide. You can expand on each section and include detailed instructions, tips, and visuals to make the guide more informative and helpful.
Introduction:
Installing a shower tile system is an exciting and rewarding project that can transform your bathroom into a stunning and functional space. However, it requires careful planning, precise execution, and adherence to specific installation guidelines to ensure a successful and long-lasting result. In this comprehensive guide, we will walk you through the step-by-step process of installing a Schluter tile shower system, a trusted and popular choice among homeowners and professionals alike.
Proper installation of a shower tile system is essential for several reasons. First, it provides a durable and waterproof barrier, protecting the underlying structure from water damage and ensuring the longevity of your shower. Second, a well-installed tile system enhances the aesthetics of your bathroom, adding beauty, style, and value to your home. Lastly, a properly installed shower tile system offers ease of maintenance and cleaning, making it a practical choice for everyday use.
Throughout this guide, we will focus on the installation of a Schluter tile shower system, which incorporates innovative and reliable products designed to simplify the installation process while delivering exceptional performance. Schluter Systems is a renowned manufacturer that offers a comprehensive range of products specifically designed for tile installations, including waterproofing membranes, shower trays, drain systems, and tile-setting materials. By following the steps and recommendations outlined in this guide, you can achieve a professional-quality shower tile installation with the Schluter system.
It is crucial to emphasize the importance of following the manufacturer’s instructions for both the Schluter products and the specific tile and setting materials you choose. Every manufacturer may have unique guidelines and recommendations, and deviating from them could compromise the performance and warranty of the products. Additionally, it is essential to have a good understanding of basic tile installation techniques and have the necessary tools and materials readily available before beginning the project.
Now that you understand the significance of proper shower tile installation and the role of Schluter products, let’s delve into the detailed steps involved in creating a beautiful and functional tile shower. With careful planning, precise execution, and attention to detail, you will be well on your way to enjoying a stunning, durable, and leak-free shower for years to come.
II. Pre-Installation Preparation:
Before diving into the installation of your Schluter tile shower system, thorough pre-installation preparation is crucial. This phase involves assessing the shower area, gathering the necessary materials and tools, and ensuring the surface is ready for tile installation. Follow the steps below to properly prepare for the installation:
A. Assessing the Shower Area:
1. Measure the shower area: Begin by accurately measuring the dimensions of the shower area. Measure the width, height, and depth of the walls and the floor. This information will help you determine the amount of tile, membrane, and other materials required for the project.
2. Determine the layout and design: Decide on the desired layout and design for your shower. Consider factors such as the tile pattern, decorative elements, accent tiles, and niche placements. Plan the placement of fixtures, such as showerheads, faucets, and handles, taking into account their compatibility with the Schluter system.
3. Check the existing subfloor or concrete slab: Inspect the condition of the subfloor or concrete slab on which the shower will be installed. Ensure that it is stable, level, and free from any cracks or damage. If there are any issues, such as an uneven surface or structural problems, address them before proceeding with the installation.
B. Gathering Materials and Tools:
1. Create a list of necessary materials: Make a comprehensive list of all the materials required for the installation. This typically includes Schluter products such as the shower tray, waterproofing membrane (such as Schluter-KERDI), drain system (such as Schluter-KERDI-DRAIN), tile-setting materials (such as thin-set mortar and grout), as well as tiles, tile spacers, and any other accessories or fixtures you plan to incorporate.
2. Check for compatibility: Ensure that the Schluter products you choose are compatible with each other and with the tile and setting materials you intend to use. Check the manufacturer’s guidelines and specifications for any specific recommendations or limitations.
3. Gather the necessary tools: Collect all the tools required for the installation process. This typically includes a measuring tape, level, tile cutter, notched trowel, grout float, sponge, tile spacers, mixing paddle, buckets, and safety equipment such as gloves and goggles. Refer to the manufacturer’s instructions for any additional tools that may be recommended.
C. Surface Preparation:
1. Prepare the subfloor or concrete slab: If the shower is being built on a wooden subfloor, install a layer of cement backer board or an appropriate tile underlayment following the manufacturer’s instructions. Ensure that the boards are securely fastened, and any seams are properly taped and mudded. If the shower is being built on a concrete slab, ensure that the surface is clean and free from debris. Repair any cracks or imperfections using appropriate patching materials.
2. Ensure a level and stable surface: It is crucial to have a level and stable surface for the tile installation. Use a level to check the flatness of the subfloor or concrete slab. If there are any low or high spots, address them by leveling the surface with appropriate techniques and materials.
By thoroughly assessing the shower area, gathering the necessary materials and tools, and preparing the surface for installation, you set the foundation for a successful Schluter tile shower system installation. This preparation phase ensures that you have a clear plan, the right materials, and a suitable surface to proceed with the installation confidently.
III. Waterproofing the Shower:
Proper waterproofing is a critical step in installing a Schluter tile shower system. It ensures that water does not penetrate the walls or floor, preventing damage to the underlying structure and potential issues such as mold or mildew growth. Schluter offers reliable and effective waterproofing solutions, such as the Schluter-KERDI membrane. Follow the steps below to properly waterproof your shower:
A. Choosing the Waterproofing System:
1. Introduction to Schluter waterproofing products: Schluter offers a range of waterproofing membranes and related products designed specifically for tile showers. One of the most commonly used products is the Schluter-KERDI waterproofing membrane, known for its durability and performance. Familiarize yourself with the features and benefits of Schluter waterproofing systems and select the appropriate product for your shower.
2. Benefits of using a waterproofing membrane: Waterproofing membranes like Schluter-KERDI provide a reliable barrier against moisture, protecting the underlying structure and preventing water damage. They are highly flexible, resistant to mold and mildew, and offer long-term durability.
3. Selecting the appropriate Schluter products: In addition to the waterproofing membrane, Schluter offers other products such as corner and seam strips, pipe seals, and sealing band, which complement the waterproofing system. Ensure that you choose the appropriate Schluter products for your specific installation requirements.
B. Applying the Waterproofing Membrane:
1. Preparing the walls and floor: Before applying the waterproofing membrane, ensure that the walls and floor of the shower area are clean, dry, and free from any debris. Remove any loose particles and smooth out any rough surfaces.
2. Applying the waterproofing membrane to the walls: Start by applying the Schluter-KERDI membrane to the walls. Cut the membrane to size, leaving a 2-inch overlap at the corners and edges. Use a trowel or roller to apply a layer of thin-set mortar to the wall. Then, press the membrane into the mortar, ensuring full coverage and proper adhesion. Smooth out any wrinkles or air pockets with a trowel or roller.
3. Installing the membrane on the shower floor: Cut the Schluter-KERDI membrane to fit the shower floor, ensuring a slight overlap with the walls. Apply thin-set mortar to the floor using a trowel, creating a uniform layer. Place the membrane on the mortar and press it down firmly, ensuring full coverage and eliminating any air pockets or wrinkles.
4. Overlapping seams and reinforcing corners: When installing the Schluter-KERDI membrane, ensure that the seams overlap by at least 2 inches. Use the Schluter-KERDI-BAND, a waterproofing strip, to cover the seams and corners. Apply thin-set mortar to the strip and press it into place, ensuring a secure and watertight seal.
By applying the Schluter-KERDI membrane and following the manufacturer’s instructions, you create a robust and waterproof barrier in your shower. This membrane serves as a reliable shield, preventing water penetration and protecting the structural integrity of your shower for years to come.
IV. Installing the Shower Tray and Drain:
The installation of the shower tray and drain is a crucial step in creating a properly functioning and leak-free Schluter tile shower system. Follow the steps below to install the shower tray and drain effectively:
A. Selecting the Shower Tray and Drain System:
1. Understanding different types of shower trays: Schluter offers a variety of shower trays to suit different installation requirements. Consider factors such as size, shape, and material when selecting the appropriate shower tray for your shower. Ensure compatibility between the chosen tray and the Schluter drain system.
2. Choosing the appropriate Schluter drain system: Schluter provides a range of drain systems, such as Schluter-KERDI-DRAIN, designed specifically for use with their waterproofing systems. Select the drain system that aligns with your shower tray and meets your design preferences and installation needs.
3. Ensuring compatibility between the tray and drain: Confirm that the chosen shower tray and drain system are compatible. Check the manufacturer’s guidelines and recommendations to ensure a proper fit and seamless integration between the tray and the drain.
B. Installing the Shower Tray:
1. Preparing the subfloor or concrete slab: Ensure that the subfloor or concrete slab is clean, level, and free from any debris or imperfections. Follow the manufacturer’s instructions for any specific requirements or recommendations regarding the subfloor preparation.
2. Securing the shower tray in place: Place the shower tray in the desired location, ensuring that it aligns with the drain opening. Use a level to check for proper slope towards the drain. Adjust the position of the tray as necessary. Once satisfied, secure the tray to the subfloor or concrete slab according to the manufacturer’s instructions. This typically involves using suitable fasteners or adhesive recommended by the manufacturer.
3. Ensuring proper slope for drainage: It is crucial to ensure that the shower tray slopes towards the drain to facilitate proper water drainage. Follow the manufacturer’s guidelines to achieve the recommended slope. Adjust the tray as needed to ensure water flows toward the drain.
C. Installing the Drain System:
1. Connecting the drain to the waste pipe: Follow the manufacturer’s instructions to connect the Schluter drain system to the waste pipe. Ensure proper alignment and a watertight connection. Use the recommended tools and materials, such as PVC primer and cement, if applicable.
2. Attaching the drain grate: Install the drain grate provided with the Schluter drain system. Follow the manufacturer’s instructions for proper installation. Ensure a secure fit and smooth transition between the drain and the shower tray surface.
3. Waterproofing the drain connection: Apply a layer of thin-set mortar around the drain connection to ensure a watertight seal. Smooth out the mortar to create a uniform and even surface. Refer to the manufacturer’s guidelines for any additional waterproofing measures or recommendations.
By properly installing the shower tray and drain system, you establish a solid foundation for your Schluter tile shower system. This ensures proper water drainage and prevents any leakage issues, contributing to a functional and reliable shower experience.
V. Tile Installation:
Once the shower tray and drain are securely in place, it’s time to move on to the exciting step of tile installation. Proper tile installation is crucial for both the aesthetics and functionality of your Schluter tile shower system. Follow the steps below to ensure a successful tile installation:
A. Gather the Necessary Materials and Tools:
1. Tiles: Select the tiles of your choice, considering factors such as size, material, and design. Ensure that the tiles are suitable for wet areas and compatible with the Schluter tile system.
2. Tile-setting materials: Gather the necessary tile-setting materials, including thin-set mortar, tile spacers, grout, and any additional tile accessories or trim pieces you plan to use.
3. Tools: Collect the tools required for tile installation, such as a notched trowel, grout float, tile cutter or wet saw, sponge, buckets, and a mixing paddle. Refer to the manufacturer’s instructions for any specific tools that may be recommended.
B. Preparing the Surface:
1. Clean the surface: Ensure that the shower walls and floor are clean, free from any dust, debris, or remnants of previous installations. Wipe down the surface using a mild detergent and water solution and allow it to dry completely before proceeding.
2. Dry layout: Before applying mortar, conduct a dry layout of the tiles on the walls and floor. This will help you visualize the final design, determine tile placement, and make any necessary adjustments.
C. Applying Thin-Set Mortar:
1. Mixing the mortar: Follow the manufacturer’s instructions to mix the thin-set mortar to the appropriate consistency. Use a mixing paddle and a bucket to achieve a smooth and uniform mortar mixture.
2. Applying mortar to the substrate: Using a notched trowel, apply a layer of thin-set mortar to a small section of the shower wall or floor. The size of the section will depend on your comfort level and the drying time of the mortar.
3. Comb the mortar: With the flat side of the trowel, spread the mortar evenly over the section. Then, using the notched side of the trowel, create grooves in the mortar. This helps create a strong bond between the tile and the substrate.
D. Installing the Tiles:
1. Placing the tiles: Begin placing the tiles onto the mortar, starting from the bottom and working your way up. Press each tile firmly into the mortar, wiggling it slightly to ensure full coverage and proper adhesion.
2. Using tile spacers: Insert tile spacers between the tiles to maintain consistent grout joints. The size of the spacers will depend on your desired grout line width.
3. Cutting tiles: When necessary, use a tile cutter or wet saw to cut tiles to fit around fixtures, corners, or edges. Take accurate measurements and make precise cuts to achieve a clean and professional finish.
4. Checking alignment: Regularly check the alignment of the tiles using a level or straight edge. Adjust as necessary to maintain straight lines and even spacing.
5. Continuing the installation: Continue applying mortar and placing tiles section by section until the entire shower walls and floor are tiled. Allow the mortar to dry and cure according to the manufacturer’s instructions.
E. Grouting and Finishing:
1. Mixing the grout: Follow the manufacturer’s instructions to mix the grout to the desired consistency. Use a grout float to achieve a smooth and workable mixture.
2. Applying the grout: Working in small sections, apply the grout diagonally to the tile joints using the grout float. Press the grout firmly into the joints, ensuring full coverage.
3. Removing excess grout: After a short drying time, use a damp sponge to wipe away excess
grout from the tile surface. Rinse the sponge frequently to prevent smearing or grout haze.
4. Final cleaning: Once the grout has fully cured, perform a final cleaning of the tiled surface using a grout haze remover or a mixture of water and vinegar. This will help remove any remaining grout residue or haze.
By following these steps, you can achieve a professional and aesthetically pleasing tile installation for your Schluter tile shower system. Take your time, pay attention to details, and ensure proper curing and drying times for the mortar and grout to achieve the best results.
VI. Grouting and Finishing:
After the tiles have been securely installed in your Schluter tile shower system, the next step is grouting. Grouting not only fills the gaps between the tiles but also adds to the visual appeal and durability of the tiled surface. Follow the steps below to properly grout and finish your shower:
A. Gather the Necessary Materials and Tools:
1. Grout: Select a grout color that complements your tile and desired aesthetic. Choose a grout type suitable for wet areas and follow the manufacturer’s recommendations.
2. Grout float: Use a grout float, which is a rubber tool with a flat and angled surface, to apply and spread the grout.
3. Grout sponge: Have a clean, damp grout sponge on hand to remove excess grout and clean the tile surface.
4. Grout sealer: Depending on the type of grout used, you may need a grout sealer to protect the grout from stains and moisture. Check the manufacturer’s instructions for specific recommendations.
B. Preparing for Grouting:
1. Pre-grout cleaning: Before applying the grout, ensure that the tiled surface is free from any debris, mortar residue, or dust. Use a damp cloth or sponge to wipe down the tiles and remove any loose particles.
2. Preparing the grout: Follow the manufacturer’s instructions to mix the grout to the desired consistency. Use a clean bucket and a grout mixing paddle to achieve a smooth and lump-free mixture.
C. Applying the Grout:
1. Applying the grout to the joints: Using the grout float, scoop a generous amount of grout and apply it to the joints diagonally. Hold the float at a 45-degree angle and press the grout firmly into the joints, ensuring full coverage.
2. Smoothing the grout lines: With the grout float, hold it at a 90-degree angle and glide it diagonally across the tile surface to remove excess grout and smooth the grout lines. Be careful not to remove too much grout from the joints.
3. Cleaning the tile surface: After allowing the grout to set for a short period (typically 15-30 minutes), use a damp grout sponge to wipe away the excess grout from the tile surface. Work in a circular motion, rinsing the sponge frequently and wringing out excess water. Be gentle to avoid disturbing the grout lines.
4. Final grout cleanup: Once the grout has dried for about 24 hours, perform a final cleanup using a dry cloth or sponge to remove any remaining grout haze or residue from the tile surface. Take care not to disturb the freshly grouted joints.
D. Sealing the Grout (if applicable):
1. Determining the need for grout sealer: Check the manufacturer’s recommendations to determine if the grout used requires sealing. Some grout types, especially porous ones, benefit from sealing to prevent staining and moisture penetration.
2. Applying the grout sealer: If sealing is necessary, carefully follow the instructions provided with the grout sealer. Apply the sealer evenly over the grout joints using a small brush or applicator. Allow the sealer to dry according to the manufacturer’s instructions.
E. Final Steps and Considerations:
1. Curing time: Allow the grout to cure fully before exposing the shower to water or heavy use. Refer to the manufacturer’s instructions for recommended curing times.
2. Regular maintenance: Once the grout has cured, maintain its cleanliness by regularly cleaning the shower area using non-abrasive cleaners and a soft brush or sponge. This helps prevent grout discoloration and keeps the tiled surface looking its best.
By following these steps and
taking care during the grouting process, you can achieve clean, durable, and aesthetically pleasing grout lines in your Schluter tile shower system. Proper grouting enhances the overall appearance and longevity of your shower, providing a finished and polished look.
VI. Maintenance and Care:
Proper maintenance and care are essential for preserving the beauty and functionality of your Schluter tile shower system. With regular upkeep and a few simple precautions, you can ensure that your shower continues to look and perform its best for years to come. Follow the guidelines below for effective maintenance and care:
A. Daily Cleaning:
1. Use mild cleaners: For daily cleaning, use mild, non-abrasive cleaners specifically formulated for tile and grout. Avoid harsh chemicals or abrasive scrubbers that can damage the tile surface or grout.
2. Wipe down surfaces: After each use, wipe down the shower surfaces, including tiles, glass, and fixtures, with a soft cloth or squeegee. This helps prevent water spots, soap scum buildup, and mineral deposits.
3. Address spills promptly: If any spills or stains occur, clean them up promptly to prevent them from setting into the grout or tiles. Blot the area gently with a clean cloth or sponge and use a suitable cleaning solution if needed.
B. Weekly Cleaning:
1. Deep clean the grout: Once a week, perform a deeper cleaning of the grout lines. Use a grout cleaner or a homemade mixture of baking soda and water to scrub the grout lines with a soft brush. Rinse thoroughly to remove any residue.
2. Clean and maintain fixtures: Pay attention to the shower fixtures, such as faucets, showerheads, and handles. Use a mild cleaner and a soft cloth to remove any buildup or spots. Dry the fixtures after cleaning to prevent water spots.
C. Periodic Maintenance:
1. Inspect for damage: Regularly inspect the tiles, grout, and caulking for any signs of damage, cracks, or loose areas. Repair or replace any damaged tiles, deteriorated grout, or worn-out caulking promptly to prevent water infiltration.
2. Reapply sealant (if applicable): If your grout or tile requires a sealer, periodically check the sealant’s effectiveness. If water no longer beads on the surface, it may be time to reapply the sealant. Follow the manufacturer’s recommendations for the frequency of resealing.
3. Maintain ventilation: Proper ventilation is crucial in preventing moisture buildup and mold growth. Ensure your shower area has adequate ventilation through exhaust fans or windows. Clean or replace ventilation fans regularly to maintain optimal airflow.
D. Preventive Measures:
1. Use mats and rugs: Place mats or rugs outside the shower area to capture excess water and prevent slipping. This helps protect the tile surface from constant moisture exposure.
2. Avoid abrasive cleaners or tools: Steer clear of abrasive cleaners, harsh chemicals, or rough scrub brushes that can scratch or damage the tile surface. Stick to gentle cleaning methods and tools.
3. Handle grout with care: Avoid using sharp or abrasive objects on the grout lines, as they can cause scratching or damage. Use gentle cleaning tools and techniques to maintain the integrity of the grout.
4. Attend to leaks promptly: If you notice any leaks or water infiltration around the shower area, address them promptly. Water damage can compromise the structure and cause more extensive issues. Seek professional assistance if needed.
By implementing these maintenance and care practices, you can preserve the beauty and functionality of your Schluter tile shower system. Regular cleaning, preventive measures, and prompt repairs will ensure that your shower remains a welcoming and enjoyable space for years to come.
VII. Conclusion:
Congratulations on completing the installation of your Schluter tile shower system! By following this comprehensive guide, you have acquired the knowledge and skills necessary to create a durable, waterproof, and visually appealing shower space. Whether you embarked on this project for a renovation, new construction, or simply to upgrade your existing shower, you can now enjoy the benefits of a professionally installed tile shower system.
Remember, the key to a successful Schluter tile shower system lies in proper pre-installation preparation, meticulous waterproofing, precise installation of the shower tray and drain, expert tile installation, and diligent maintenance and care. By adhering to the manufacturer’s instructions, using high-quality Schluter products, and following the recommended best practices, you have ensured the longevity and performance of your shower.
With your completed Schluter tile shower system, you can relish in a beautiful, functional, and low-maintenance shower that enhances the overall aesthetics of your bathroom. The combination of Schluter’s innovative products and your attention to detail guarantees a reliable and leak-free showering experience.
Remember to continue practicing regular maintenance and care to preserve the integrity of your shower system. By keeping the surfaces clean, addressing repairs promptly, and following the recommended guidelines, you will enjoy your Schluter tile shower system for years to come.
Thank you for choosing making it through this intensive how to guide on Schluter and investing the time and effort into creating a high-quality tile shower system. Enjoy the satisfaction of a job well done and the pleasure of a luxurious shower experience in your newly transformed space.
If you need comprehensive installation videos, then visit the attached link. Schluter systems are outstanding products that our company uses for our complete waterproofing systems. If you’re looking for a professional to help with your bathroom renovation in Lancaster PA. Then get in touch with us here at B&M Home Improvement Solutions to discuss your project today!
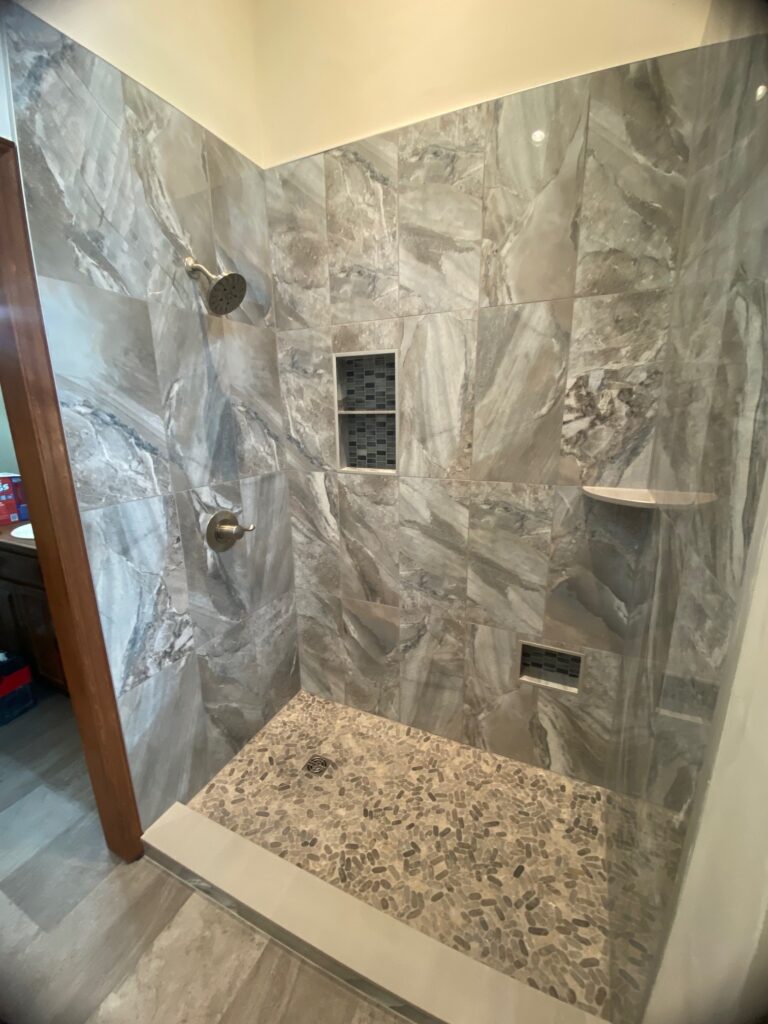
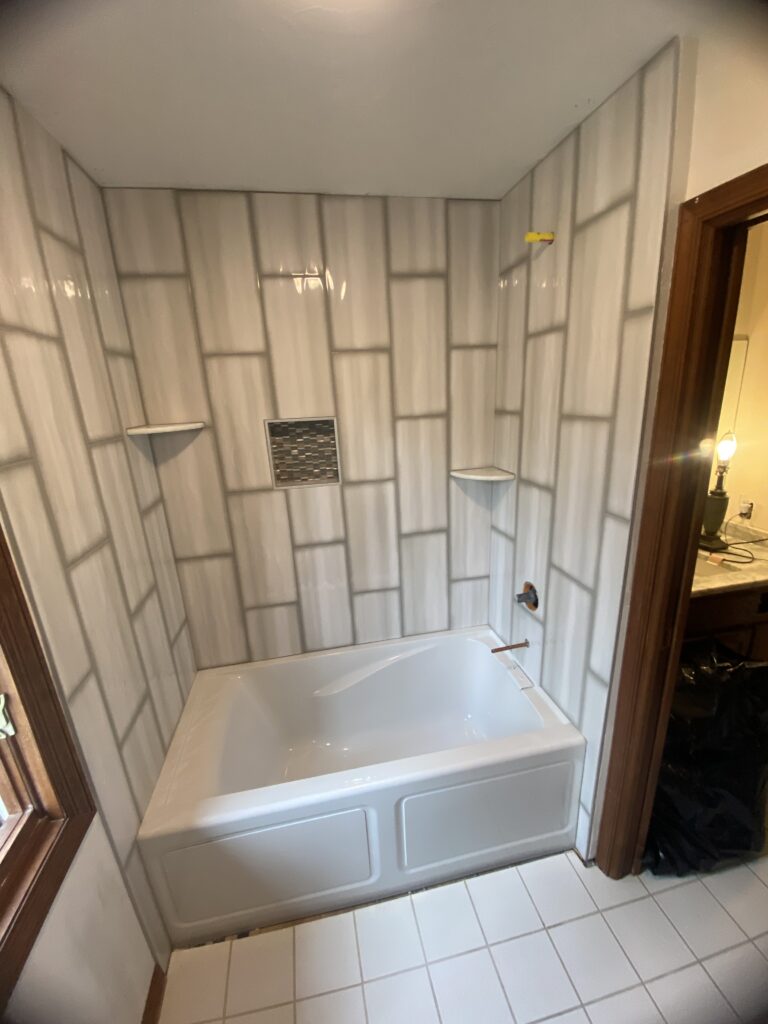
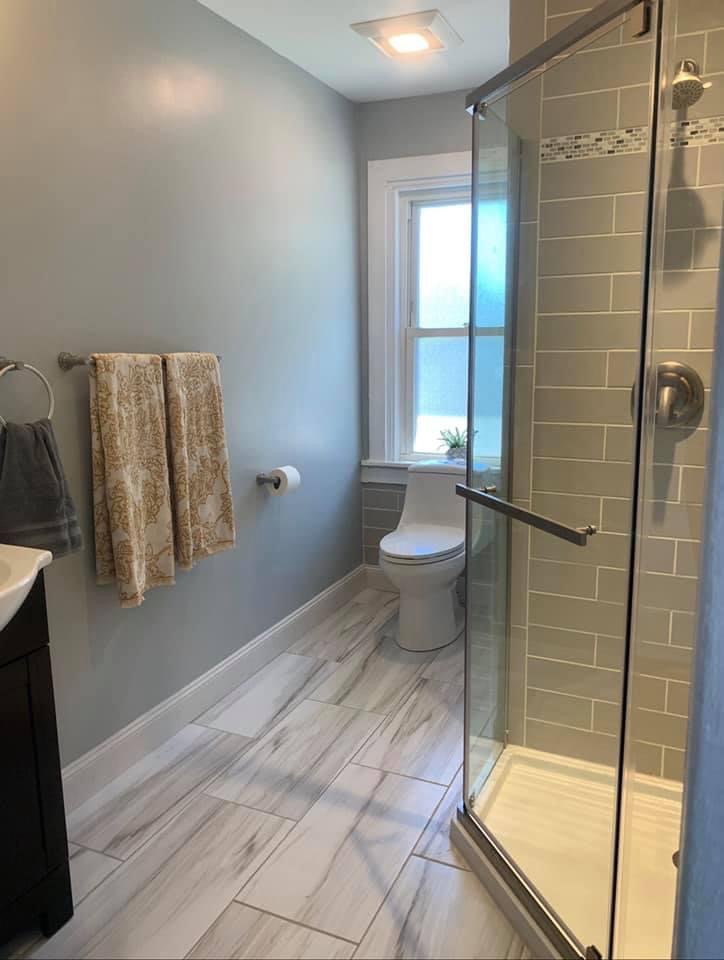
Projects B&M Home Improvement Completed with full waterproofing System That will Last for many YEARS!