

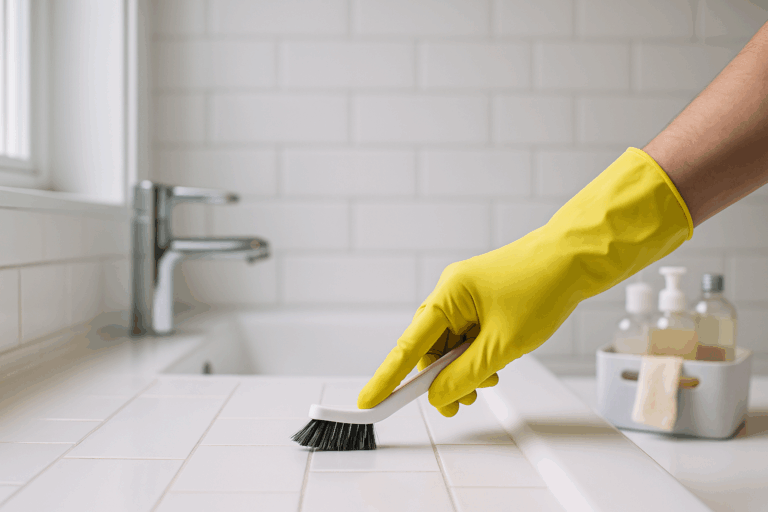
The Complete Homeowner’s Guide to Cleaning Grout (Lancaster & York, PA)
Tile looks fantastic—until the grout turns dingy. If you’re in Lancaster or York, PA and your bathroom or kitchen grout is looking stained, moldy, or just tired, this guide will walk you through exactly how to clean it safely and keep it cleaner, longer. We’ll cover what type of grout you have, the right products and tools to use, step‑by‑step methods from light refresh to heavy‑duty restoration, and when it’s best to call a pro.
Why Grout Gets Dirty (and Why It’s Tricky)
Grout is porous. Those tiny pores trap soap scum, skin oils, minerals from hard water, and airborne dust. In damp spaces like showers, moisture lingers and feeds mildew. Because grout sits slightly lower than tile, grime settles right into the lines, where it’s hard to reach with a sponge. Using the wrong cleaner (especially strong acids on cementitious grout or on natural stone) can etch, discolor, or weaken the grout itself—so correct product choice matters.
Identify Your Grout and Surface First
Before you clean, determine:
Grout type
Cement‑based (sanded/unsanded): Most common. Porous; responds well to gentle alkaline cleaners, oxygen bleach, and hydrogen peroxide. Sensitive to strong acids.
Epoxy grout: Dense and stain‑resistant. Typically cleans with mild, non‑abrasive detergents. Avoid harsh solvents.
Tile/stone type
Ceramic/porcelain tile: Durable; tolerates a wide range of cleaners.
Natural stone (marble, travertine, limestone, slate): Sensitive to acid. Avoid vinegar, lemon, and acidic products. Use stone‑safe, neutral‑pH cleaners only.
Patch test any new cleaner in an out‑of‑the‑way spot first.
Safety First
Ventilate well; switch on the exhaust fan and open a window.
Wear gloves and eye protection.
Never mix bleach and ammonia (or any unknown chemicals).
Rinse surfaces thoroughly between different products.
Tool & Supply Checklist
Soft to medium nylon grout brush (toothbrush works in a pinch—avoid metal bristles)
Microfiber cloths and a small bucket
Spray bottle for ready‑to‑use solutions
pH‑neutral tile & grout cleaner (stone‑safe if needed)
Oxygen bleach (powdered sodium percarbonate) or a reputable oxygen‑based cleaner
3% hydrogen peroxide (for lightening organic stains)
Baking soda (to make a gentle paste)
Chlorine bleach (optional; last‑resort spot treatment on white cement grout only)
Steam cleaner (optional but highly effective for deep sanitation)
Grout sealer (penetrating, water‑based for cement grout; not used on epoxy)
Quick‑Start: The 10‑Minute Refresh
Best for: Light soap scum, week‑to‑week upkeep.
Spray a pH‑neutral tile & grout cleaner on the lines.
Wait 3–5 minutes (let chemistry do the work).
Scrub grout lines with a nylon brush using short, back‑and‑forth strokes.
Rinse with warm water; wipe dry with microfiber.
Run the fan or squeegee walls to speed drying (discourages mildew).
Repeat weekly in active showers; every 2–4 weeks in low‑use areas.
Deep‑Clean Methods by Problem
A) Built‑Up Grime & Soap Scum (Cement Grout)
Mix an oxygen bleach solution per label directions (often 1–2 Tbsp powder in a quart of warm water).
Apply generously to grout; keep the area wet for 10–15 minutes. Re‑mist if it begins to dry.
Scrub gently; you’ll see foam lift soils.
Rinse thoroughly and dry.
For stubborn spots, apply a baking‑soda paste (baking soda + a little water), scrub, and rinse.
Why it works: Oxygen bleach breaks down organic soils without harsh fumes and is less damaging than acids on cement grout.
B) Mildew or Mold Staining (Non‑Stone Surfaces)
Spray 3% hydrogen peroxide directly on stained grout; let sit 10 minutes.
Scrub and rinse.
Repeat if needed.
For persistent mildew on white cement grout only, a diluted chlorine bleach (per label) can be spot‑applied; ventilate well and rinse thoroughly.
Note: Skip chlorine bleach on colored grout and on natural stone. Avoid frequent bleach use; it can weaken grout over time.
C) Hard‑Water Deposits (Ceramic/Porcelain Only)
Use a non‑acidic hard‑water remover or a product labeled safe for grout.
Allow dwell time; scrub lightly.
Rinse very well.
Avoid vinegar or acid on cement grout and never on natural stone; acids can etch and lighten grout or damage stone surfaces.
D) Natural Stone Areas (Marble, Travertine, Limestone, Slate)
Use a stone‑safe, pH‑neutral cleaner only.
Agitate with a soft brush; avoid abrasives.
Rinse and microfiber‑dry.
Consider a stone‑specific sealer for added protection (grout and stone may need separate products).
If stains persist, consult a stone‑care professional; aggressive DIY methods can permanently etch stone.
E) Epoxy Grout
Wipe with a mild, non‑abrasive cleaner; scrub lightly.
Most stains remain on the surface; avoid solvents unless the manufacturer says they’re safe.
Steam Cleaning: A Pro‑Level Boost
A consumer steam cleaner can penetrate pores and lift biofilm without chemicals. Use a small detail nozzle/brush and keep the tool moving to avoid overheating a single spot. Steam works especially well along corners, inside niches, and at the floor line where grime accumulates.
Step‑by‑Step: Full Shower Grout Reset (Weekend Project)
Time: 60–90 minutes active work + dwell time
Best for: Heavily used family showers in Lancaster & York homes
Declutter & prep
Remove bottles and accessories. Vacuum or dry‑dust to remove hair and lint.Pre‑clean wash
Spray pH‑neutral cleaner; wipe tile faces so your deep cleaner can focus on grout. Rinse.Targeted treatment
Oxygen bleach solution on grout lines (keep wet 10–15 min).
Hydrogen peroxide on darker mildew patches (non‑stone areas).
Agitate
Scrub grout in short strokes; pay attention to corners and lower rows.Rinse thoroughly
Warm water rinse from top to bottom.Steam (optional)
Work seams, corners, and niches to lift remaining residue.Dry completely
Microfiber towels + run exhaust fan or a box fan for 30–60 minutes.Seal (cement grout only; tile/stone must be dry)
Apply a penetrating grout sealer per label, usually with a small applicator bottle or foam brush. Wipe any sealer off tile faces promptly. Allow full cure time before use (often 24 hours).
Sealing 101 (The Secret to Staying Clean)
Sealing cementitious grout reduces porosity, making spills and soap film easier to wipe away.
When to seal: After a deep clean and complete dry‑out (grout should be bone dry). New grout typically needs to cure for 48–72 hours—check your grout manufacturer’s recommendation.
How often: High‑use showers every 6–12 months; floors every 12–18 months.
Test it: Drip water on the grout. If it darkens immediately, it’s time to reseal.
Don’t seal: Epoxy grout doesn’t need sealing; natural stone may need a separate stone sealer.
Maintenance Schedule for Lancaster & York Homes
Humidity and hard water vary across neighborhoods in Lancaster County and York, so adjust as needed:
After every shower: Squeegee walls and glass; run the fan for 20–30 minutes.
Weekly: Quick‑start refresh on grout lines + wipe shelf/niche areas where bottles sit.
Monthly: Spot‑treat any mildew with hydrogen peroxide; clean caulk seams.
Twice yearly: Deep‑clean + reseal cement grout as needed.
Troubleshooting Stubborn Stains
Yellowing around metal trim: Could be rust; use a rust remover labeled safe for tile/grout (not for natural stone).
Persistent pink biofilm: Clean more frequently; treat with oxygen bleach followed by thorough drying.
Cracked or missing grout: Cleaning won’t fix damage. Regrout the affected area and then seal.
Caulk turning black: Replace moldy or failed caulk; use 100% silicone in wet zones.
When to Call a Professional
Natural stone that needs stain removal or honing
Severe mildew behind caulk or across large areas
Crumbling grout needing regrouting
Shower systems older than 15–20 years with recurring leaks or soft walls
As a bathroom‑focused remodeler, B&M Home Improvement Solutions (Lancaster & York, PA) can assess whether a deep clean, a simple regrout/recalk, or a tub‑to‑shower conversion will give you the best long‑term result.
Local Tip: Hard Water in South‑Central PA
Many homes in Lancaster and York have moderate to hard water, which leaves mineral film that traps soap and soil. Using a daily squeegee and a weekly neutral cleaner dramatically reduces build‑up. If you have a water softener, keep salt levels and settings tuned to avoid excess residue.
DIY vs. Upgrade: Is It Time for New Grout or New Walls?
If your grout is permanently stained, missing, or the tiles are shifting, cleaning is a band‑aid. You may benefit from:
Regrouting & recaulking: Restores look and watertightness.
Solid‑surface shower systems: Fewer joints, low maintenance, modern look.
Custom tile with epoxy grout: Premium look with better stain resistance.
We can help you compare options and timelines to fit your home in Lancaster or York.
FAQs
Can I use vinegar on grout?
Avoid vinegar on cement grout (it’s acidic) and never use it on natural stone. Use neutral‑pH or oxygen‑based products instead.
Will bleach whiten grout?
On white cement grout, occasional diluted chlorine bleach can lighten stains—but overuse can weaken grout and discolor adjacent materials. Try oxygen bleach or hydrogen peroxide first.
What brush should I use?
A nylon grout brush is ideal. Skip metal bristles; they can scratch tile and the grout surface.
How long should cleaner sit before scrubbing?
Give most products 5–15 minutes of dwell time so chemistry does the heavy lifting—then scrub and rinse well.
Do I have to seal grout?
Cement grout benefits greatly from sealing. Epoxy grout does not need sealing.
Looking for a Bathroom Contractor in Lancaster and York PA?
Ready for grout that stays clean—or a bathroom that’s easier to maintain? B&M Home Improvement Solutions specializes in shower replacements and tub‑to‑shower conversions in Lancaster and York, PA. We’ll help you choose a low‑maintenance system, repair or regrout where needed, and ensure everything is sealed correctly.
Request a consultation:
Phone: 717‑449‑8789
Email: BMHomeImprovementSolutions@gmail.com